Dia 30" x 84" Reverse Flow Design

Discussion about Reverse Flow Smokers
rob g
Wants to build a smoker
Posts: 20
Joined: May 7th, 2013, 11:19 pm

Dia 30" x 84" Reverse Flow Design

Post by rob g » January 13th, 2021, 12:06 pm

I'm doing a smoker design for a friend that has scrounged a dia 30" x 84" tank. Between the knowledge shared on this site and friends in the competitive BBQ community this is what I have come up with. I would like to pass this by the people here to see if there is something I neglected to take into account.
- I used the pit calculator here to size my firebox, chimney and throat opening to suit my tank.
- The opening at the end of the baffle plate is about 30 sq in above my throat size but I have added holes to the barricade plate, at the end of the baffle plate, so I can bolt in a filler piece to suit down the road.
- The baffle plate is 1/4"
- The firebox is constructed of 1/4" plate, laser cut and broke to suit, with a 14ga shroud to cover over the 1-1/2" of Roxul insulation board.
- I have 5-1/2" of space between the bottom of the firebox and the top of the fire grate.
- The vents are 3-1/2" x 11" on either side of the firebox.
- The firebox door is similar in design with "X" bracing inside to help minimize warpage.
- My fire grate is 1/8" x 1" flat bar on edge at 1" C-C. 3 laser cut bars with notches will hold the welded bars in position
- The chimney is 6x8 rect tube with the front cut off to expose the complete chimney from the top of the firebox to the top of the tank. I have added a bolt-on filler plate to allow the opening to be tuned for exhaust position control.
- The cook racks are 1X1 sq tube with 3/4-9 flattened expanded metal for the cook surface
- My lower cook rack is located 4-5/8" above the baffle plate.
- There is 7" of space between the lower cook rack and the upper rack with another 6-3/8 of space above the upper rack.
- Am I making proper use of the available space for my cook racks?
- The door counterweight is bolted to the door hinge, pieces of 2x2x1/4 angle, so the forces go thru the hinge point. This also allows the counterweight to have its position adjusted at the set-up to get a good balance.
- The cover on the chimney top is intended more for rain protection but can also be used to help tune the air flow if needed.
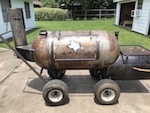
- The feet under the tank are laser cut and broke, with 1" bolt holes, with the intention of the tank being bolted to a trailer at some point. It will likely get mounted to a makeshift frame and moved with a loader tractor for the short term.
- I thought of adding lift rings to the top of the tank but was unsure if the tank would might want to distort when being pulled at the top once the door has been cut out. My build is approximately 1800 lb at this point.
The hinges on my cook chamber door have a dia 17/32 hole while the tank hinge has a 3/4 hole. The idea is to laser cut a spacer to fill the 3/4 hole when the hinges are first welded to the tank, before the door is completely cut out. After the door is finished and the gasket added the spacers in the hinge will be removed so the door can float a bit. Weld washers on the tank hinge will be welded in place to secure the door position. Am I overthinking this?

What am I missing?
PIC-1 1-13-21.JPG
PIC-2 1-13-21.JPG
PIC-3 1-13-21.JPG
PIC-4 1-13-21.JPG


Sign Up For SmokerBuilderU
dacolson

Re: Dia 30" x 84" Reverse Flow Design

Post by dacolson » January 13th, 2021, 5:45 pm

I don’t think you can ever overthink a build. Really nice layout.
Things to consider:
- Baffle plate gap - smaller tends to be better than larger than your throat area. It’s good you have a way to adjust it down in size later on. If your heat gets too hard to keep down, consider restricting the baffle gap by closing that down a bit.
- Shadow plate - radiant heat through the throat tends to really heat up the fb end of the baffle. Consider adding a shadow plate below your baffle. It’s like a shorter baffle a couple inches below you actual baffle that protects the first 12 to 18” of your baffle from direct heat.
- rack space between racks - consider moving your top rack up a bit. Even if it’s just an inch. I’ve knocked the bark of too many pieces a meat sliding my racks out at 6” gap. You can dedicate your top rack to ribs and wings.
- chimney cover - good idea for rain cover but control your heat with the fb vents, not your stack. It kills the draw.
- Fire grate - I’ve had really good luck with v-shaped racks vs flat racks. The v keeps the coals together so nicely that fire management is a piece of cake. No logs shifting during a burn or blocking your airflow. Just a thought.

Your drawings look awesome. The counterweight design is super cool. She’s gonna be a fantastic cooker. Can’t wait to see your build. Good luck!


rob g
Wants to build a smoker
Posts: 20
Joined: May 7th, 2013, 11:19 pm

Re: Dia 30" x 84" Reverse Flow Design

Post by rob g » January 13th, 2021, 7:24 pm

dacolson wrote:
January 13th, 2021, 5:45 pm
I don’t think you can ever overthink a build. Really nice layout.
Things to consider:
- Baffle plate gap - smaller tends to be better than larger than your throat area. It’s good you have a way to adjust it down in size later on. If your heat gets too hard to keep down, consider restricting the baffle gap by closing that down a bit.
- Shadow plate - radiant heat through the throat tends to really heat up the fb end of the baffle. Consider adding a shadow plate below your baffle. It’s like a shorter baffle a couple inches below you actual baffle that protects the first 12 to 18” of your baffle from direct heat.
would you bring the shadow plate back in to the firebox a couple inches
- rack space between racks - consider moving your top rack up a bit. Even if it’s just an inch. I’ve knocked the bark of too many pieces a meat sliding my racks out at 6” gap. You can dedicate your top rack to ribs and wings.
I currently have 7" between grates. Insufficient?? 8" would still leave 5.4" over the upper grate
- chimney cover - good idea for rain cover but control your heat with the fb vents, not your stack. It kills the draw.
- Fire grate - I’ve had really good luck with v-shaped racks vs flat racks. The v keeps the coals together so nicely that fire management is a piece of cake. No logs shifting during a burn or blocking your airflow. Just a thought.
I can turn some angle over easy enough. 1x1 or 3/4x3/4?? What gap is advisable between the angle for airflow. Do you run the angles side to side for better weight support or front to back which would allow easier clean out?

Your drawings look awesome. Thanks. I do machine design for a living and have a full version of SolidWorks.The counterweight design is super cool. She’s gonna be a fantastic cooker. Can’t wait to see your build. Me too lol. My buddy is a welder fitter. I wouldn't want to cook on anything I welded together. Good luck!
Thanks for the feedback. I learned years ago it is much easier to learn from other people's mistakes than fix my own.


dacolson

Re: Dia 30" x 84" Reverse Flow Design

Post by dacolson » January 13th, 2021, 9:04 pm

rob g wrote:
January 13th, 2021, 7:24 pm

would you bring the shadow plate back in to the firebox a couple inches
- does your baffle sit directly above the top of your throat opening? If you have a few inches between the top of your throat and the bottom of the baffle, just put the shadow plate directly at the top of your throat. You say you have 4 5/8” between your bottom grate and the baffle plate. You could always move the baffle up an inch and a half to make a bit of room for the shadow plate. A 3” gap between baffle and grate is ok.

I currently have 7" between grates. Insufficient?? 8" would still leave 5.4" over the upper grate
- this is a convenience and use preference. If you plan on stacking pork pork butts on both racks you might leave them closer together to get more use out of the top. Otherwise you can prioritize thick on the bottom, thinner meats up top. Really up to you. I’ve been trying to keep mine spaced close to 8”.

I can turn some angle over easy enough. 1x1 or 3/4x3/4?? What gap is advisable between the angle for airflow. Do you run the angles side to side for better weight support or front to back which would allow easier clean out?
Not sure I’m catching what you mean here. Angle iron instead of the grate? If you're going with a flat bottomed log grate, the expanded metal is fine. Very usable. I’ve built some v-shaped baskets as have a few others on here that I really like but there are many many fire grates like yours that work well. Here’s a pic of one of mine:
59F2C3D8-8EF0-4883-BAC1-56EBCA459D36.jpeg
59F2C3D8-8EF0-4883-BAC1-56EBCA459D36.jpeg (38.64 KiB) Viewed 975 times


rob g
Wants to build a smoker
Posts: 20
Joined: May 7th, 2013, 11:19 pm

Re: Dia 30" x 84" Reverse Flow Design

Post by rob g » January 14th, 2021, 12:57 pm

dacolson wrote:
January 13th, 2021, 9:04 pm
rob g wrote:
January 13th, 2021, 7:24 pm

would you bring the shadow plate back in to the firebox a couple inches
- does your baffle sit directly above the top of your throat opening? If you have a few inches between the top of your throat and the bottom of the baffle, just put the shadow plate directly at the top of your throat. You say you have 4 5/8” between your bottom grate and the baffle plate. You could always move the baffle up an inch and a half to make a bit of room for the shadow plate. A 3” gap between baffle and grate is ok.
PIC-1 1-14-21.JPG
I've made the changes to get the shadow plate off the top edge of the firebox with a 2" gap to the baffle plate

I currently have 7" between grates. Insufficient?? 8" would still leave 5.4" over the upper grate
- this is a convenience and use preference. If you plan on stacking pork pork butts on both racks you might leave them closer together to get more use out of the top. Otherwise you can prioritize thick on the bottom, thinner meats up top. Really up to you. I’ve been trying to keep mine spaced close to 8”.

I can turn some angle over easy enough. 1x1 or 3/4x3/4?? What gap is advisable between the angle for airflow. Do you run the angles side to side for better weight support or front to back which would allow easier clean out?
Not sure I’m catching what you mean here. Angle iron instead of the grate? If you're going with a flat bottomed log grate, the expanded metal is fine. Very usable. I’ve built some v-shaped baskets as have a few others on here that I really like but there are many many fire grates like yours that work well. Here’s a pic of one of mine:

59F2C3D8-8EF0-4883-BAC1-56EBCA459D36.jpeg
PIC-2 1-14-21.JPG
This is what I was thinking of when you mentioned angle for the firebox.
PIC-3 1-14-21.JPG
What is the best method for securing the firebox door? I currently have a single latch with the latch plate slotted and bolted on so it can be tightened up. Should I have a latch top and bottom for the door? Is it better to add pull clamps/hold down clamps top and bottom to keep the door tight? The insulated door is roughly 26x30 with 1/4" plate at the closure surface. There is an internal "X" for bracing to help minimize warpage.


dacolson

Re: Dia 30" x 84" Reverse Flow Design

Post by dacolson » January 14th, 2021, 8:28 pm

Your drawing of the shadow plate is perfect.

On the grate, your angle iron will last longer, but if I had to choose, I’d go with the expanded steel. Much more airflow.

Your door latch is fine as well. Looks good.


Sent from my iPad using Tapatalk


rob g
Wants to build a smoker
Posts: 20
Joined: May 7th, 2013, 11:19 pm

Re: Dia 30

Post by rob g » January 14th, 2021, 10:19 pm

dacolson wrote:
January 14th, 2021, 8:28 pm
Your drawing of the shadow plate is perfect.

On the grate, your angle iron will last longer, but if I had to choose, I’d go with the expanded steel. Much more airflow.

Your door latch is fine as well. Looks good.


Sent from my iPad using Tapatalk
Thanks for your feedback and help. I can start doing detail drawings now and get material quoted.


dacolson

Re: Dia 30" x 84" Reverse Flow Design

Post by dacolson » January 14th, 2021, 10:31 pm

Good luck!


User avatar
hogaboomer
Expert
Expert
Posts: 919
Joined: July 15th, 2019, 9:47 am
Title: old pipe welder
BBQ Comp Team Name: Not competing yet...
Location: Groves, TX.

Re: Dia 30" x 84" Reverse Flow Design

Post by hogaboomer » January 14th, 2021, 11:00 pm

I think you guys maybe got sideways with each other on the fire grate design. Dacolson wasn't referencing angle iron for the grate, he actually uses a V shaped design for his grate, made out of round bar. It hangs from the top of the firebox, from angle iron rails. It looks like it works great.
Rob G mentioned making this grate out of 1/8 x 1" flat bar. I like this idea as well, but I think something a bit thicker might be better.
I made my last one out of expanded metal, the same one we all use for the cook chamber grates. I doubled it up, and braced it underneath, because it seems a little flimsy for all that heat. I'm thinking of doing something different for the next one. I like the round bar idea, there's always plenty of that around in the shop.


I live on Hogaboom Road.

rob g
Wants to build a smoker
Posts: 20
Joined: May 7th, 2013, 11:19 pm

Re: Dia 30" x 84" Reverse Flow Design

Post by rob g » January 15th, 2021, 9:18 am

Once I seen the pic of the vee shape design I understood what Dacolson was referencing. Its a good idea for keeping the wood and coals collected. I'm going to stay with the 1/8×1 flatbar on edge design for my fire grate as it gives us more flexibility. We have the ability make up a charcoal basket and push it in, use splits or a combination of both. We can also make up a v-shaped grate and set it in.

I'm trying to design this smoker using "best" practices while at the same time making it easy to make changes if something doesn't work out as planned i.e. the bolt-on counterweight. After 30+ years of machine design I've learned "it seemed like a good idea" sometimes comes back to bite you 😆


rob g
Wants to build a smoker
Posts: 20
Joined: May 7th, 2013, 11:19 pm

Re: Dia 30" x 84" Reverse Flow Design

Post by rob g » January 29th, 2021, 6:54 pm

Haven't got all the material ordered yet but the build has kicked off.
IMG_20210129_184742.jpg
IMG_20210129_184729.jpg


dacolson

Re: Dia 30" x 84" Reverse Flow Design

Post by dacolson » January 29th, 2021, 11:41 pm

Nice looking burnout. That’s a fun day. You’re on your way!


Sent from my iPhone using Tapatalk


User avatar
Big T
Moderator
Moderator
Posts: 6897
Joined: September 1st, 2013, 2:40 pm
Title: Go Getter
BBQ Comp Team Name: Backyard Boys
Location: Lower Alabama

Re: Dia 30" x 84" Reverse Flow Design

Post by Big T » January 30th, 2021, 9:52 pm

:yth: :kewl:


Measure Twice.....Cut Three Times.

rob g
Wants to build a smoker
Posts: 20
Joined: May 7th, 2013, 11:19 pm

Re: Dia 30" x 84" Reverse Flow Design

Post by rob g » February 25th, 2021, 10:28 pm

The laser cutting has finally arrived this week. Let the assembly begin. Firebox first
-5451152753627613710.jpg


rob g
Wants to build a smoker
Posts: 20
Joined: May 7th, 2013, 11:19 pm

Re: Dia 30" x 84" Reverse Flow Design

Post by rob g » March 2nd, 2021, 9:12 pm

Firebox, chimney, shadow plate installed tonight and baffle plate tacked soon
IMG_20210302_202545.jpg


dacolson

Re: Dia 30" x 84" Reverse Flow Design

Post by dacolson » March 2nd, 2021, 10:04 pm

great progress. You'll be cooking soon.


User avatar
Big T
Moderator
Moderator
Posts: 6897
Joined: September 1st, 2013, 2:40 pm
Title: Go Getter
BBQ Comp Team Name: Backyard Boys
Location: Lower Alabama

Re: Dia 30" x 84" Reverse Flow Design

Post by Big T » March 2nd, 2021, 11:16 pm

:yth:


Measure Twice.....Cut Three Times.

rob g
Wants to build a smoker
Posts: 20
Joined: May 7th, 2013, 11:19 pm

Re: Dia 30" x 84" Reverse Flow Design

Post by rob g » March 6th, 2021, 2:40 pm

Starting to look like a smoker. Lots of little things to do yet. The guys are doing a great job.
5801428818265235478.jpg


dacolson

Re: Dia 30" x 84" Reverse Flow Design

Post by dacolson » March 6th, 2021, 2:47 pm

I like the thermometer frames. Sharp


rob g
Wants to build a smoker
Posts: 20
Joined: May 7th, 2013, 11:19 pm

Re: Dia 30" x 84" Reverse Flow Design

Post by rob g » April 2nd, 2021, 4:42 pm

Smoker fired up for seasoning and leak check. A little work to be done to finish the trailer yet but it is almost done. The guys have done a great job on it. The one friend is really looking forward to having his shop back lol
IMG_20210402_121147.jpg
IMG_20210402_120632.jpg
IMG_20210402_120514.jpg


dacolson

Re: Dia 30" x 84" Reverse Flow Design

Post by dacolson » April 2nd, 2021, 5:05 pm

:beer: Nice looking rig!


Kcd2016
Wants More tools
Wants More tools
Posts: 114
Joined: September 23rd, 2016, 4:46 pm

Re: Dia 30" x 84" Reverse Flow Design

Post by Kcd2016 » April 2nd, 2021, 7:39 pm

Post #1 implies first build, correct?
I'd grade this a solid 75... Out of a scale of 1-10!
Y'all knocked it out of the park!

Those hinges are really interesting... you got my wheels spinning now. I had the same plan with installing mounting brackets with bolt holes instead of permanently welding it to something. I'll probably also weld on permanent attachment points for tie downs/hoisting.


rob g
Wants to build a smoker
Posts: 20
Joined: May 7th, 2013, 11:19 pm

Re: Dia 30" x 84" Reverse Flow Design

Post by rob g » April 2nd, 2021, 7:58 pm

Kcd2016 wrote:
April 2nd, 2021, 7:39 pm
Post #1 implies first build, correct?
I'd grade this a solid 75... Out of a scale of 1-10!
Y'all knocked it out of the park!

Those hinges are really interesting... you got my wheels spinning now. I had the same plan with installing mounting brackets with bolt holes instead of permanently welding it to something. I'll probably also weld on permanent attachment points for tie downs/hoisting.
It was our first build. I take no credit for the build though. I do machine design for a living but haven't welded anything since highschool lol. My friends wanted a smoker and had a tank to base it on. One of the guys is a millwright with fabrication skills and he gets the kudos for the build. All of the experience on this site made the design a whole lot easier. Just a matter of a little reading and asking a few questions.


User avatar
Dirtytires
Expert
Expert
Posts: 3845
Joined: November 24th, 2015, 12:36 am
Title: It ain't broke...yet
BBQ Comp Team Name: Dont compete...cook for events once in a while
Location: Phoenix, Az

Re: Dia 30" x 84" Reverse Flow Design

Post by Dirtytires » April 3rd, 2021, 10:50 am

Now the fun really starts! Cooking, learning, eating....,repeat!

Congrats....


rob g
Wants to build a smoker
Posts: 20
Joined: May 7th, 2013, 11:19 pm

Re: Dia 30" x 84" Reverse Flow Design

Post by rob g » April 3rd, 2021, 12:01 pm

Dirtytires wrote:
April 3rd, 2021, 10:50 am
Now the fun really starts! Cooking, learning, eating....,repeat!

Congrats....
The door issue is mostly resolved. There is a brisket going on it tomorrow. Dustin got tired of burning wood in while we were sorting out problems and not eating so he threw some sausages into it this morning while we were testing.


Post Reply
  • Similar Topics
    Replies
    Views
    Last post

Return to “Reverse Flow Smokers”