
Short comment: Tanner, Puff is correct.
Long explanation:
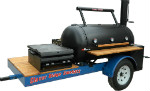
When you talk about opening sizes you are talking about 2 dimensional requirements. Generally that's all you need to be concerned with - until you get to the stack. The stack's job is to help maintain the draft once established - i.e. create a slight vacuum at the top end of the system to help keep the air moving through. It's ability to do that is based on it's internal capacity - the QUANTITY of hot air inside it that's trying to get out. This is why the original wood-fired railroad steam engines had funnel stacks. They had to increase the volume of the stack to keep a good draw against a wood fire WITHOUT getting too tall to clear the overhead obstructions/tunnels etc. When the railroads could buy coal far enough west along their coast-to-coast routes they then converted their fleet to coal in the early 1900's and the funnel stack went away. If they weren't such a pain to build, the funnel stack design would look cool on a cooker and it would probably fit through the garage door too!
Just remember the old hot-rodders adage "There's no substitute for cubic inches".
Here's the last paragraph - I promise…..
In a well-sealed rig, the stack is the draft's best friend. I've always felt - and I can almost prove it - the stack damper should roughly follow the movements of the draft. It seems when I do that my draft adjustments are more effective.Following this reasoning to it's logical conclusion you would not want to drift too far away from the pit calc recommendations because an oversized stack should tend to make your draft hyper-critical and "touchy" to adjust.
Now I feel better - Whew! …. I have to go sit down for a bit …..