king cooker project

Discussion about Reverse Flow Smokers
Post Reply
User avatar
Frank_Cox
Site Admin
Site Admin
Posts: 7160
Joined: January 17th, 2011, 6:30 pm
BBQ Comp Team Name: https://smokerbuilderu.com
Contact:

king cooker project

Post by Frank_Cox » January 22nd, 2011, 9:25 pm


(This post was transferred from our old forums)


Author Topic: king cooker project
rlmax02
Weekend Warrior
Posts: 37


Post king cooker project
on: January 16, 2011, 13:00


Ok boys. I mentioned in another thread I
was gonna go and look at another tank
today that might be a bit smaller than my
330gal i was going to use for this project.
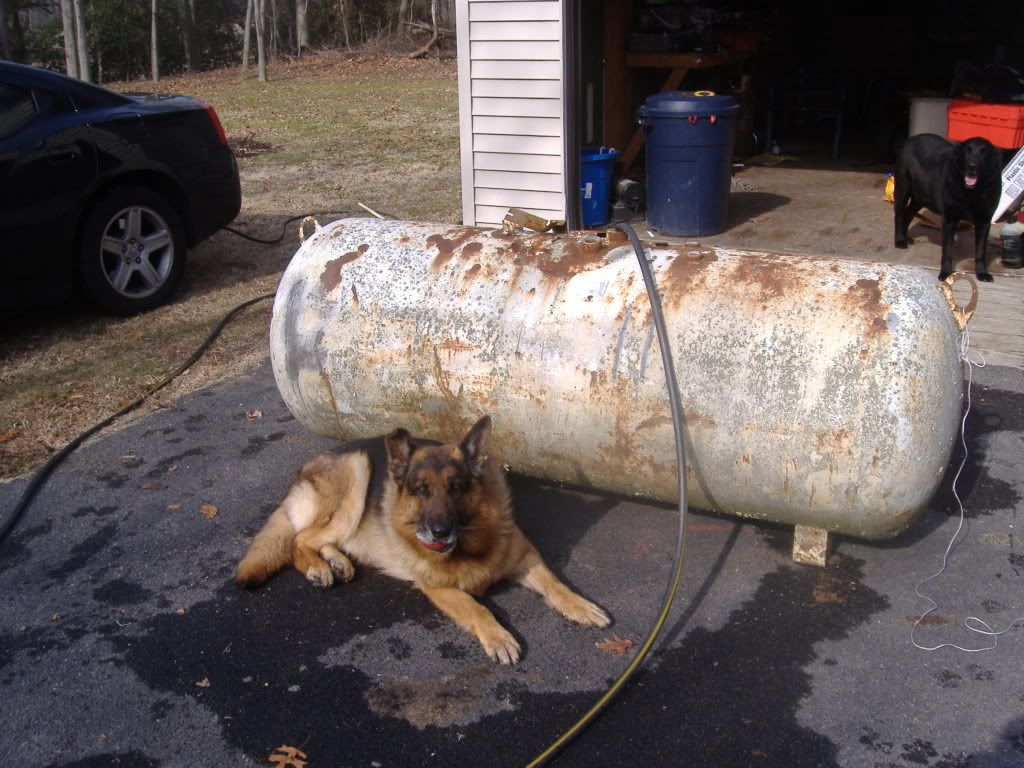
well i did take a look and its gonna be perfect.
We hooked it to a backhoe and loaded her up.
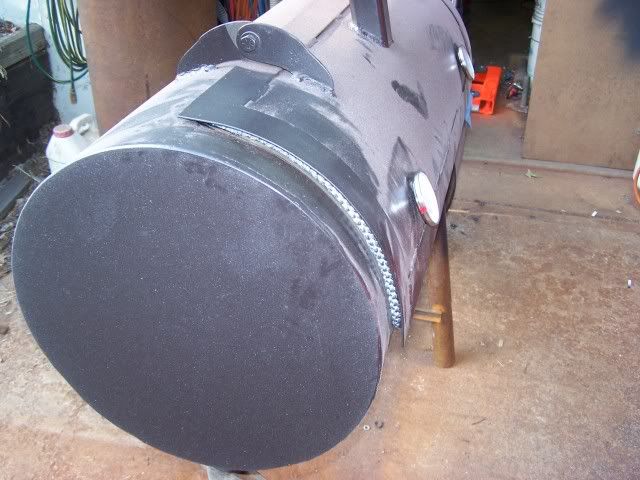
I dont know the exact size but after I take off
one of the welded ends it will be 76″ and is
30″ in diameter. much more managable for
how I will be cooking. So its venting as we
speak and if all goes well I should be starting
on the project within 2 weeks. Im gonna try
and sell the 330gal tank i have to pay for some
1/4 steel. Can i get a firebox size that will work
with this size tank if anyone has one similiar.
rlmaxs tank.jpg
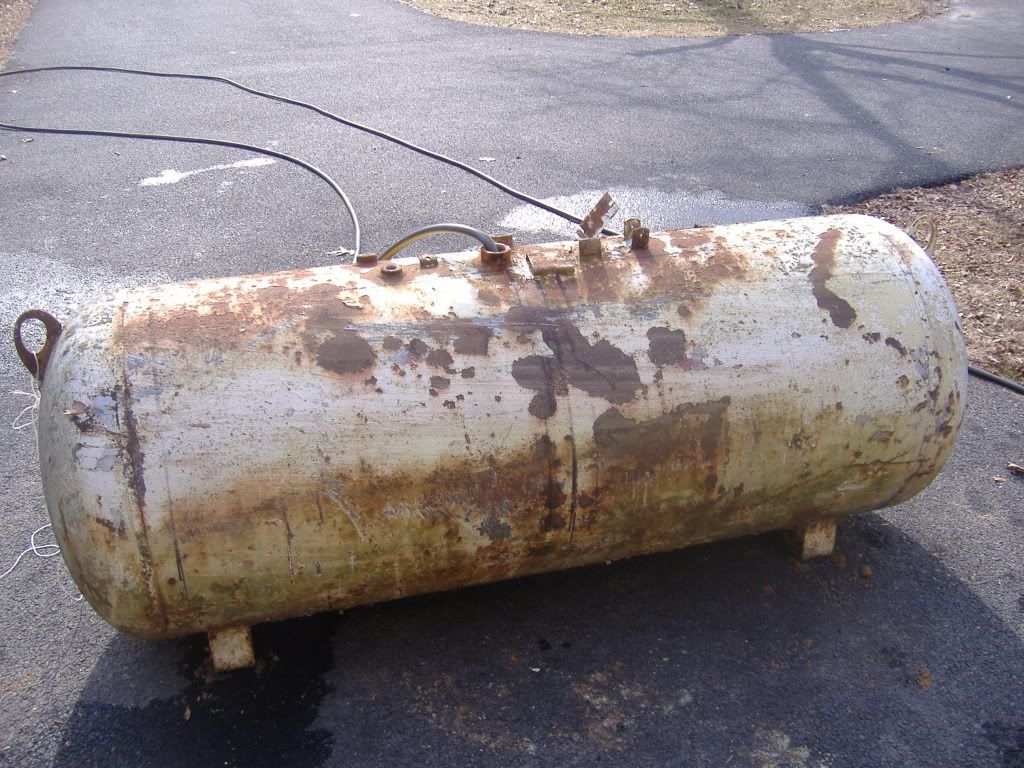
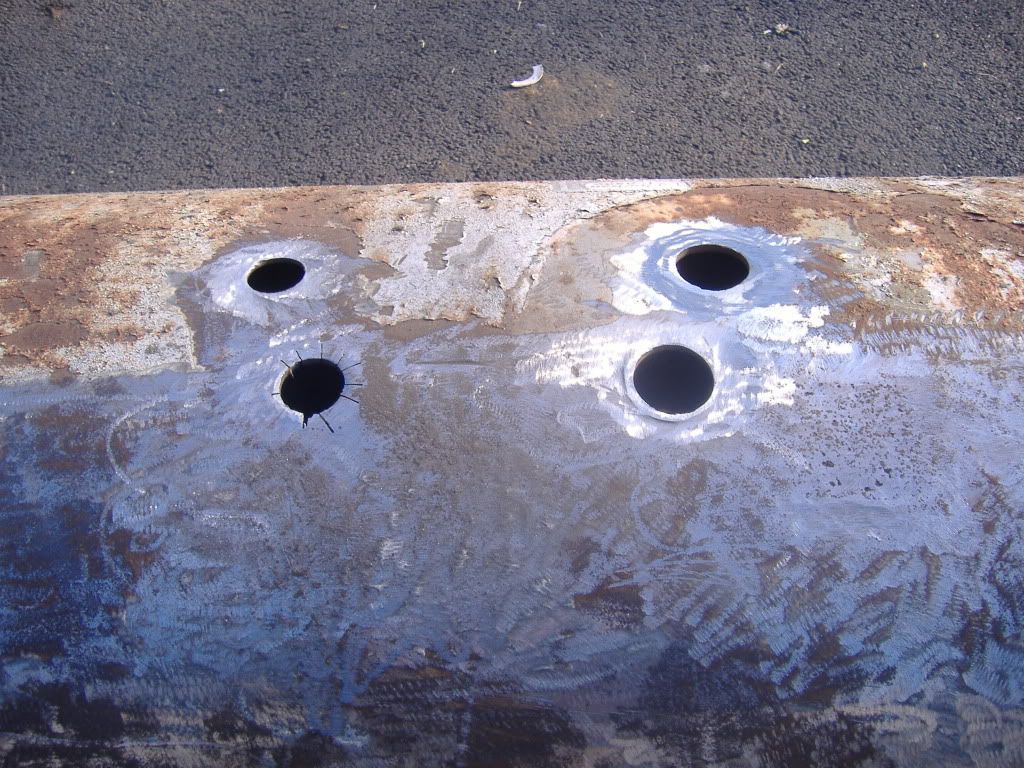
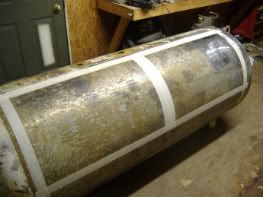
rlmaxs tank.jpg (213.87 KiB) Viewed 1850 times
Remember…wherever you go….There you are.


Smoker Tom
Moderator
Posts: 96


Post Re: king cooker project
on: January 16, 2011, 16:59


Thats a great find!!

Frank has done the numbers on several of these with the helical ends. It should be even easier since you are cutting one end all the way off.

Any chance that you are going to make a fire pit from the cut end?


rlmax02
Weekend Warrior
Posts: 37


Post Re: king cooker project
on: January 16, 2011, 17:18


I was actually thinking about incorporating it into a charcoal grill somehow on the trailer. fire pit sounds good tho as well

Remember…wherever you go….There you are.


Frank_Cox
Administrator
Posts: 104


Post Re: king cooker project
on: January 17, 2011, 10:33


Man thats a great tank for your build! I’ll help you figure out you firebox. Don’t forget to fill the tank with dawn dishwashing soap and water for a while until it overflows for completely purging the tank, assuming it was a propane tank. The dawn dishwashing soap has surfactants in it which breaks the surface tension of the water and allows the water to get into all the crevices of the tank. 8-)

Smoker Builder!


Frank_Cox
Administrator
Posts: 104


Post Re: king cooker project
on: January 17, 2011, 10:39


By the way rlmax, are you getting any emails from me? I may need to get a different email address from you. If you could send an email to smokerbuilder@gmail.com from any email you would like to use.
Thanks!

Smoker Builder!


rlmax02
Weekend Warrior
Posts: 37


Post Re: king cooker project
on: January 17, 2011, 11:01


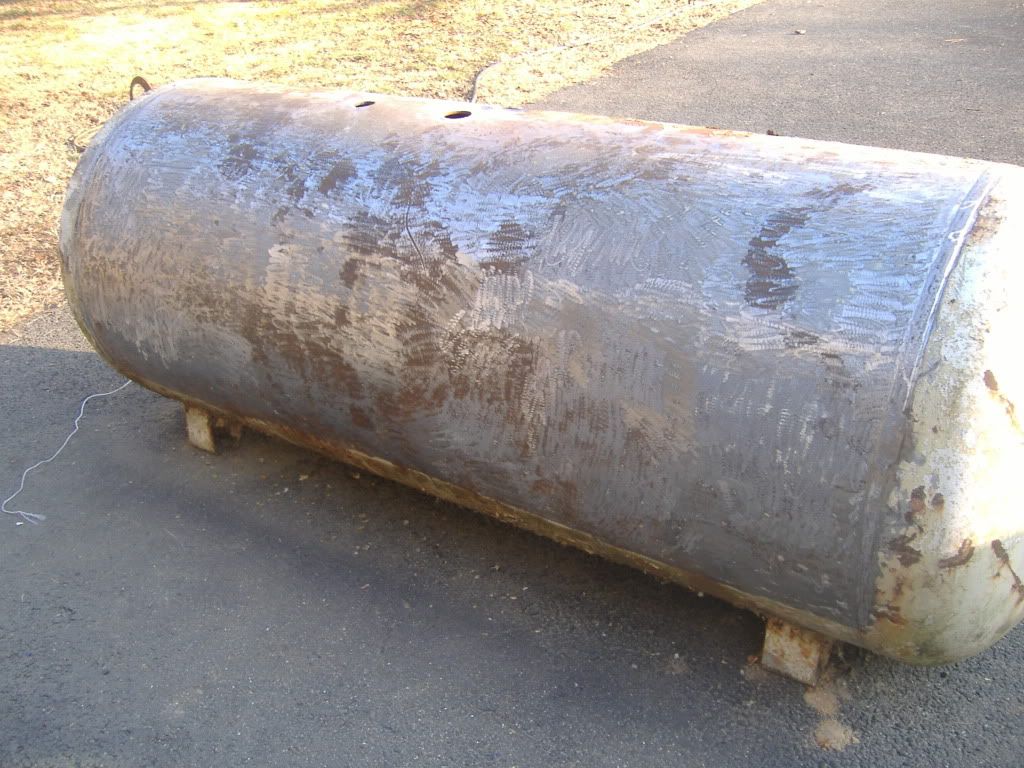
hey frank i got the last email from you. Its my work email so I check it the most. Its pinchak@princessannepolice.com. It was a propane tank which still has some in it. I was going to fill it with exhaust while im cutting but may also do the water deal prior to cutting to be safe. I want to lop off 1 end so i can have a nice flat surface to mount the warming box on top of the firebox. This tank is much better for the project. See what smoking a few butts and inviting friends will get you!

Remember…wherever you go….There you are.


rlmax02
Weekend Warrior
Posts: 37


Post Re: king cooker project
on: January 17, 2011, 15:10


I have been jotting some stuff on paper and I think cutting off the end is now a silly idea. Ill just notch it instead. save alot of time and money i think

Remember…wherever you go….There you are.


Frank_Cox
Administrator
Posts: 104

Post Re: king cooker project
on: January 17, 2011, 16:45


Great talkin to ya today rlmax! I hope I answered all your questions, if not let me know! I know we all are looking forward to seeing your build progress!

Smoker Builder!


rlmax02
Weekend Warrior
Posts: 37


Post Re: king cooker project
on: January 17, 2011, 17:17


Thank you Frank. your information is priceless. Im sitting down now with my CAD program and gonna start the process up. I do have 1 other question and that is how long should the baffle plate go? to the factory weld? or shorter.

Remember…wherever you go….There you are.


Frank_Cox
Administrator
Posts: 104


Post Re: king cooker project
on: January 17, 2011, 19:29


Your going to want the baffle plate gap on your smoker to be somewhere between 30 and 45 square inches. Of course that is for your smoker. It would be different for someone elses smoker since this depends on the other dimensions of each particular smoker. I will be going into this in depth in other main posts.


Sign Up For SmokerBuilderU
User avatar
Frank_Cox
Site Admin
Site Admin
Posts: 7160
Joined: January 17th, 2011, 6:30 pm
BBQ Comp Team Name: https://smokerbuilderu.com
Contact:

Re: king cooker project

Post by Frank_Cox » January 22nd, 2011, 9:32 pm

rlmax02
Weekend Warrior
Posts: 37


Post Re: king cooker project
on: January 17, 2011, 20:48


thanks again frank. Im starting to get obsessed with building this rig.

Remember…wherever you go….There you are.


Frank_Cox
Administrator
Posts: 104


Post Re: king cooker project
on: January 17, 2011, 21:35


I sure am glad I could contribute to your addiction to smoker building 8)

Smoker Builder!


Smoker Tom
Moderator
Posts: 96


Post Re: king cooker project
on: January 17, 2011, 21:44


I figure I better contribute into the trip to page three before the build gets underway.


rlmax02
Weekend Warrior
Posts: 37


Post Re: king cooker project
on: January 18, 2011, 16:34


Hey guys I drew up the firebox on autocad last night to include a vent system on top of the firebox to allow smoke and heat into the warmer box for smaller cooks. Frank knows this already but I have a friend that has a laser CNC machine at his work. Hes agreed to nest everything and cut it out for me. Gonna be freakin great!. Work is killin me today. gonna be an all niter for sure so ill shout out later.

Remember…wherever you go….There you are.


Frank_Cox
Administrator
Posts: 104


Post Re: king cooker project
on: January 18, 2011, 17:24


you can’t beat those kinda deals! havin a buddy with cnc equipment is great LOL

Smoker Builder!


Frank_Cox
Administrator
Posts: 104


Post Re: king cooker project
on: January 20, 2011, 08:09


Quote from Smoker Tom on January 17, 2011, 21:44
I figure I better contribute into the trip to page three before the build gets underway.

Wouldn’t want ya to miss out on page 3 LOL!

Smoker Builder!


Smoker Tom
Moderator
Posts: 96


Post Re: king cooker project
on: January 20, 2011, 20:58


I would love to see what you have come up with. That is, when you have time, and so long as its not top secret.

If you dont mind sharing, PM me and I will get ya my e mail.

Oh ya, cnc is cool but laser cnc is way cooler!!!!
Nice score.


rlmax02
Weekend Warrior
Posts: 37


Post Re: king cooker project
on: January 20, 2011, 21:11


hey tom. hit me up at pinchak@princessannepolice.com and ill attach the drawings and mail you back. Just the firebox right now. I sold my 330gal tank to another smoker builder. Hes coming to pick it up on monday so ill order the steel on tues. I turned him on to the site so I hope he joins up

Remember…wherever you go….There you are.


Frank_Cox
Administrator
Posts: 104


Post Re: king cooker project
on: January 20, 2011, 21:15


thanks for promoting the site rlmax!

Smoker Builder!


Smoker Tom
Moderator
Posts: 96


Post Re: king cooker project
on: January 22, 2011, 01:33


Here is a shot of the firebox rob, all I did was open it in inkscape and export it as a jpeg. Anyways heres the pic you sent. Looking foward to the rest, thanks for taking the time to send them to me.
totalimage_dwg.jpg
totalimage_dwg.jpg (27.56 KiB) Viewed 1849 times


User avatar
Frank_Cox
Site Admin
Site Admin
Posts: 7160
Joined: January 17th, 2011, 6:30 pm
BBQ Comp Team Name: https://smokerbuilderu.com
Contact:

Re: king cooker project

Post by Frank_Cox » January 22nd, 2011, 9:37 pm

Smoker Tom
Moderator
Posts: 96


Post Re: king cooker project
on: January 22, 2011, 01:39


Without seeing the whole thing its hard to tell but I see that it says (sides 2 )

It looks to me like you are putting the vents on the sides of the firebox.

Not that it won’t work fine, but my preference is to have the vents oppisite of the entrance to the cook area. Such as on the door on a standard offset firebox rig.


rlmax02
Weekend Warrior
Posts: 37


Post Re: king cooker project
on: January 22, 2011, 08:38


I had planned on putting a slide out ash tray in the bottom of the firebox that could be taken out with the doors closed so i figured the vents would be good on the side

Remember…wherever you go….There you are.


Smoker Tom
Moderator
Posts: 96


Post Re: king cooker project
on: January 22, 2011, 09:26


Thats cool rob, the only reason I mentioned it was because I have never done one with the vents on the sides.

I have seen some guys have trouble with the slide out ash trays tho. You will need a really good fit when the tray is in the closed position to prevent unwanted air from entering the firebox.

The key to a long steady controled burn is to have complete and total control of where the air enters. Also if you were to ever want to add a stoker or a guru to the pit, you dont want any air sneaking in from unwanted locations.


rlmax02
Weekend Warrior
Posts: 37


Post Re: king cooker project
on: January 22, 2011, 15:43


I see where your coming from. i shot you another email with the whole firebox set. hopefully I did it the right way this time and you got more than 1 pic. If you want to post it up go ahead. plus whatever input you guys have would be welcomed

Remember…wherever you go….There you are.


Smoker Tom
Moderator
Posts: 96


Post Re: king cooker project
on: January 22, 2011, 18:34


Here ya go Rob. Thanks again.
I am stumped with the upper right hand drawing. Is that the door or the roof?
Fireboxdesign_dwg.jpg
Fireboxdesign_dwg.jpg (49.09 KiB) Viewed 1849 times


User avatar
rlmax02
Expert
Expert
Posts: 418
Joined: January 23rd, 2011, 1:14 pm
Title: Member
BBQ Comp Team Name: JUST BUSTED BBQ

Re: king cooker project

Post by rlmax02 » January 23rd, 2011, 1:21 pm

Hey tom. the uper right is the top of the firebox. the 5 cutouts will be covered with the 5 squares you see on the side and be connected to slide as a unit. this will be used when I want the warmer box to become a smoke box for smaller cooks or a rib box or to be hotter than the main chamber. convection heat should keep this around 170 I would think anyway. My goal is to be able to operate the warmer/smoker box independent of the main chamber. what do you think of the cutout for the main chamber. Big enough? I will keep the cutout and use it as a dampner to shut off the main cooking area when I dont need it.


REMEMBER....WHEREVER YOU GO...THERE YOU ARE.

User avatar
rlmax02
Expert
Expert
Posts: 418
Joined: January 23rd, 2011, 1:14 pm
Title: Member
BBQ Comp Team Name: JUST BUSTED BBQ

Re: king cooker project

Post by rlmax02 » January 23rd, 2011, 1:25 pm

dont you just love autocad! I had to redo the sides of the box as well for the sliding vent to work properly. Ive ordered the 4x8 sheet of steel so hopefully my buddy will be able to nest these and cut them out by next week. then you will see some ugly welds


REMEMBER....WHEREVER YOU GO...THERE YOU ARE.

User avatar
Frank_Cox
Site Admin
Site Admin
Posts: 7160
Joined: January 17th, 2011, 6:30 pm
BBQ Comp Team Name: https://smokerbuilderu.com
Contact:

Re: king cooker project

Post by Frank_Cox » January 23rd, 2011, 1:33 pm

Looks fine to me, i think your build is gonna be a good one! cant wait to see it start to come together. :mrgreen:


User avatar
Frank_Cox
Site Admin
Site Admin
Posts: 7160
Joined: January 17th, 2011, 6:30 pm
BBQ Comp Team Name: https://smokerbuilderu.com
Contact:

Re: king cooker project

Post by Frank_Cox » January 23rd, 2011, 1:34 pm

hey rlmax, did you get your tank cut open yet? just wondering how it went if ya did.


User avatar
rlmax02
Expert
Expert
Posts: 418
Joined: January 23rd, 2011, 1:14 pm
Title: Member
BBQ Comp Team Name: JUST BUSTED BBQ

Re: king cooker project

Post by rlmax02 » January 23rd, 2011, 1:47 pm

no i havent made a cut in it yet. in fact i took it outta my truck today so i could move a couch for my wife! Its still airing out. I planned on getting the firebox complete since its 21 degrees out and im in no hurry. I did take some measurements on the old boat trailer and I have started to sketch a few things out. Has anyone ever made a burner from pipe? Ive seen a few on you tube but was wondering if anyone has actually tried it and would it be cost effective.


REMEMBER....WHEREVER YOU GO...THERE YOU ARE.

User avatar
Frank_Cox
Site Admin
Site Admin
Posts: 7160
Joined: January 17th, 2011, 6:30 pm
BBQ Comp Team Name: https://smokerbuilderu.com
Contact:

Re: king cooker project

Post by Frank_Cox » January 23rd, 2011, 2:44 pm

I was going to do that for a log lighter in my fire box, but i was looking on amazon .com and I was able to add all 3 burner styles from the Bayou Classic deep fryers to our store. They are CHEAP! I was also able to add all the hoses, regulators, and the main orifice they use. The big burner requires a different orifice that is not currently available in the store but it can be ordered directly from Bayou Classic.
I decided for the money I'll just use what they already have. :mrgreen:


User avatar
Tom_Heath
Founder
Founder
Posts: 3408
Joined: January 17th, 2011, 10:36 pm
Title: TortillaTom
BBQ Comp Team Name: SmokerBuilder
Location: Rolla Mo

Re: king cooker project

Post by Tom_Heath » January 23rd, 2011, 4:16 pm

I ran the calc using the numbers of 30 dia and 80 inches long.

For that you need 18840 cu in for the fire box and you have 21600 cu in. So you are in great shape there.

I come up with a stack 6" dia of 38 to 40 in long.

Calc says 10.37 on air intake for the fire and you are at 10 openings 2.5"x2.5" , so you should be close there.

The fire to cook area needs to be 172.80 cu in and you are only at 128.1 cu in.
If you open it up to 27" wide by 9 tall in the center you will be at 175.6 cu in.


My vote would be to maybe go with 10 in tall by 27 inchs wide for the hatch between the fire and the cook area. The calc works out the minimum numbers, so going a little bigger won't hurt ya any.


Click here : How to Upload Pics (Video) | Click here : Are you on FaceBook? |
--->Click here : Need plans for your build? OR Message me at ---->>> https://m.me/SmokerPlans
--->Are you interested in building smokers for profit?
Click here : Shoot me a PM to learn about a new opportunity launching soon!

User avatar
rlmax02
Expert
Expert
Posts: 418
Joined: January 23rd, 2011, 1:14 pm
Title: Member
BBQ Comp Team Name: JUST BUSTED BBQ

Re: king cooker project

Post by rlmax02 » January 23rd, 2011, 4:38 pm

Thanks tom ill make the change to the drawing.


REMEMBER....WHEREVER YOU GO...THERE YOU ARE.


User avatar
rlmax02
Expert
Expert
Posts: 418
Joined: January 23rd, 2011, 1:14 pm
Title: Member
BBQ Comp Team Name: JUST BUSTED BBQ

Re: king cooker project

Post by rlmax02 » January 27th, 2011, 9:04 am

Hey guys. the update goes like this. The gentleman who is buying my 330gal tank has had to postpone his trip to the easternshore because we got snow dumped on us again. no sold tank, no money for steel. my yard smells like a propane factory lol but no worries. soon as we melt down a little the king cooker will be in the works. Drawings are nested and ready to cut. Im excited and I probably should have done this in the fall. only that messes up hunting season. Ill keep everyone posted of course!


REMEMBER....WHEREVER YOU GO...THERE YOU ARE.

User avatar
Frank_Cox
Site Admin
Site Admin
Posts: 7160
Joined: January 17th, 2011, 6:30 pm
BBQ Comp Team Name: https://smokerbuilderu.com
Contact:

Re: king cooker project

Post by Frank_Cox » January 27th, 2011, 4:30 pm

We are all anxiously awaiting to see your build! :mrgreen:
By the way, take a camera or a video camera with ya when your buddy cuts your parts out so we can post it. those tables are freakin kool! 8-)


User avatar
rlmax02
Expert
Expert
Posts: 418
Joined: January 23rd, 2011, 1:14 pm
Title: Member
BBQ Comp Team Name: JUST BUSTED BBQ

Re: king cooker project

Post by rlmax02 » January 29th, 2011, 1:51 pm

we had a little bit of a warming trend here. its up to 35degrees so tomorrow i may lay out the doors and start opening up the tank. my question is do you normaly lay the bottom of the door at the tanksat the 3 or 9 oclock position and the top at 12? or do we come down a bit. ill be putting 2 doors on this build.


REMEMBER....WHEREVER YOU GO...THERE YOU ARE.

User avatar
Frank_Cox
Site Admin
Site Admin
Posts: 7160
Joined: January 17th, 2011, 6:30 pm
BBQ Comp Team Name: https://smokerbuilderu.com
Contact:

Re: king cooker project

Post by Frank_Cox » January 29th, 2011, 1:55 pm

I usually go from T.D.C or 12 o clock and find the 90 degree point then come down from that point about 2 inches. course that depends on the diameter of the tank or pipe. i think thats what i'd do on yours. you also could just come up from the baffle plate about 2 inches to maximize shelf space :mrgreen:


User avatar
rlmax02
Expert
Expert
Posts: 418
Joined: January 23rd, 2011, 1:14 pm
Title: Member
BBQ Comp Team Name: JUST BUSTED BBQ

Re: king cooker project

Post by rlmax02 » January 29th, 2011, 2:16 pm

many thanks as usual Frank.


REMEMBER....WHEREVER YOU GO...THERE YOU ARE.

User avatar
Tom_Heath
Founder
Founder
Posts: 3408
Joined: January 17th, 2011, 10:36 pm
Title: TortillaTom
BBQ Comp Team Name: SmokerBuilder
Location: Rolla Mo

Re: king cooker project

Post by Tom_Heath » January 29th, 2011, 9:04 pm

My last one has the top of the door just forward of TDC by an inch or two.


Click here : How to Upload Pics (Video) | Click here : Are you on FaceBook? |
--->Click here : Need plans for your build? OR Message me at ---->>> https://m.me/SmokerPlans
--->Are you interested in building smokers for profit?
Click here : Shoot me a PM to learn about a new opportunity launching soon!

User avatar
Tom_Heath
Founder
Founder
Posts: 3408
Joined: January 17th, 2011, 10:36 pm
Title: TortillaTom
BBQ Comp Team Name: SmokerBuilder
Location: Rolla Mo

Re: king cooker project

Post by Tom_Heath » January 29th, 2011, 9:29 pm

I fully intended to post a pic in the last response and I got to talkin and forgot. LOL

Image

My hinge design is working decent but I am not completely happy with it. I think I need to change the bolt location a little bit toward the back.

I will mention this only in case you didn't know its helpfull to weld your hinge on before you complete the cuts for the doors.
It kinda helps keep things where they belong.


Click here : How to Upload Pics (Video) | Click here : Are you on FaceBook? |
--->Click here : Need plans for your build? OR Message me at ---->>> https://m.me/SmokerPlans
--->Are you interested in building smokers for profit?
Click here : Shoot me a PM to learn about a new opportunity launching soon!

User avatar
rlmax02
Expert
Expert
Posts: 418
Joined: January 23rd, 2011, 1:14 pm
Title: Member
BBQ Comp Team Name: JUST BUSTED BBQ

Re: king cooker project

Post by rlmax02 » January 30th, 2011, 5:35 pm

well my friends, I took advantage of a nice day and
decided to work on the tank. I started by piping some
car exhaust into the tank to make the propane inert.
Image
As you can see my partner is keeping an eye on things
for me. This thing has 4 layers of paint so to get a smooth
surface to lay out my doors I decided to grind away the front
half.
Image
Heres the next pic of it ground down along with the nipples and covers
cut out.
Image
close up of nipple holes. Ill patch these from the inside and weld them out.
Image
been a good day. got the project off the drawing board anyway. Thanks for the hinge
advice tom!


REMEMBER....WHEREVER YOU GO...THERE YOU ARE.

User avatar
Tom_Heath
Founder
Founder
Posts: 3408
Joined: January 17th, 2011, 10:36 pm
Title: TortillaTom
BBQ Comp Team Name: SmokerBuilder
Location: Rolla Mo

Re: king cooker project

Post by Tom_Heath » January 30th, 2011, 6:16 pm

Looking good!!

Hey, if you ever cut another tank, two things.

1. I just learned this the other night on a welding board. The car exhaust is actually a very low amount of carbon monoxide with todays emissions standards. Yes its high with carbon monoxide when its in a closed space due to the fact that the exhaust is being taken back into the motor depleting the oxygen that it normally receives outdoors.

The post made alot of sence. And it actually said dry ice is a better producer of the carbon momoxide. I can try to grab the link to the post if you are interested in reading it.

2. I always like to cut my largest opening first vs cutting the bungs from the tank. Its just me, I figure that the larger the hole the less chance of built pressure.

You may ought to think about searching online for some walter flap disc. You will be amazed at how long they last and also how fabulous they work. There are pricey but OMG they work great. I have personally used there enduro-flex flapper and also there flexcut grinding wheel. What I use at the time all depends what I am working on, how nice I want it to look and what type of finish I want to end up with.


Click here : How to Upload Pics (Video) | Click here : Are you on FaceBook? |
--->Click here : Need plans for your build? OR Message me at ---->>> https://m.me/SmokerPlans
--->Are you interested in building smokers for profit?
Click here : Shoot me a PM to learn about a new opportunity launching soon!

User avatar
rlmax02
Expert
Expert
Posts: 418
Joined: January 23rd, 2011, 1:14 pm
Title: Member
BBQ Comp Team Name: JUST BUSTED BBQ

Re: king cooker project

Post by rlmax02 » January 30th, 2011, 7:28 pm

I had seen the dry ice posts before. I could smell the slight odor of propane just before I made my cuts and could feel the flow coming out of the tanks and lucky me I guess. No boom! i was thinking about it the whole time though. I had planned on hitting the whole tank with 80grit prior to anykind of finish but now I think ill try one of those wheels out. Thanks


REMEMBER....WHEREVER YOU GO...THERE YOU ARE.

User avatar
Frank_Cox
Site Admin
Site Admin
Posts: 7160
Joined: January 17th, 2011, 6:30 pm
BBQ Comp Team Name: https://smokerbuilderu.com
Contact:

Re: king cooker project

Post by Frank_Cox » January 30th, 2011, 7:57 pm

I really need to put a thumbs up smiley on here! so you get an exclamation point icon... :!: :!:
looking great so far! those flap discs are the stuff. I really like using those. great pics too 8-)


User avatar
rlmax02
Expert
Expert
Posts: 418
Joined: January 23rd, 2011, 1:14 pm
Title: Member
BBQ Comp Team Name: JUST BUSTED BBQ

Re: king cooker project

Post by rlmax02 » January 30th, 2011, 8:28 pm

Thanks Frank. probably be next weekend before I get anything else done. Im excited tho just to get started.


REMEMBER....WHEREVER YOU GO...THERE YOU ARE.

User avatar
rlmax02
Expert
Expert
Posts: 418
Joined: January 23rd, 2011, 1:14 pm
Title: Member
BBQ Comp Team Name: JUST BUSTED BBQ

Re: king cooker project

Post by rlmax02 » February 5th, 2011, 11:20 pm

well gents today I finally sold my 330 gal tank. time to pay for some steel.
I was so happy I got into the mood to do some work.
I dragged my tank into my little shed and popped her open.

Image

heres how I laid the doors out.

Image

and heres after the first cut.

I stopped at this point but maybe ill cut the otherside out before the super bowl. ;)
I didnt weld the hinges prior because...well..my welder isnt here yet. :oops:
I bought a mig and am waiting patiently for it to be delivered.
I must say that after some good advice I purchased a few flap wheels and I must
say that THEY ROCK! I dont know how I lived without them.
The tank is also 1/4 thick. I was assuming it was 3/16. Good deal for me!
stay tuned fellow smokers.


REMEMBER....WHEREVER YOU GO...THERE YOU ARE.

Post Reply

Return to “Reverse Flow Smokers”