First offset build! Have some questions.

Horizontal smokers with a side firebox and tuning plates.
Post Reply
User avatar
thejm
Needs more Steel
Needs more Steel
Posts: 126
Joined: July 23rd, 2020, 7:45 pm

First offset build! Have some questions.

Post by thejm » July 27th, 2020, 9:28 pm

Hey guys,

This is my first post here. I have been lurking here for a while and have learned a lot from all the great info on this site. This seems like a great community full of people who love BBQ and are willing to share their experience and knowledge! Happy to be here. I am going to try and keep this post as concise as possible but I apologize if it gets a little long.

Purpose
I am very excited that I am about to start building my first smoker out of a 250 gallon propane tank that I bought (empty, valves off). This will be my first offset build and want to get it right so I am here to ask the experts for some advice. I currently have a Big Green Egg and its great at searing and grilling and ok at smoking but I find myself endlessly tweaking vents to keep the temperature from spiking or diving (not to mention the lack of smoke flavor). I want to make the best BBQ possible so I so I’ve decided to build my own offset. I’m also tired of the constant vent adjustments and am ready for a traditional smoker that drafts well by design and the only factor controlling temperature is how often I put a log on the fire. Thats why I want to take my time with the design so I make sure I get it right. I have been studying offsets online for a while watching several YouTube channels and scouring several forums. I also have Aaron Franklin’s Masterclass and I have his book The BBQ Manifesto. I have learned a lot. I am trying to model my offset in the very traditional style that Franklin uses. I really like how particular he is about the details.

I will walk you through my current design and then I have several questions that I need help with before I start the build. My goal is to have a smoker with as consistent temps as possible throughout the grill though I know there will be some variation from firebox to stack due to the fact that its an offset. I will update this thread as kind of a ‘build log’ as I make progress and am hoping this thread can serve as a resource for anyone else building a similar smoker. Feel free to comment on my design in any way not just on the questions I’m asking. I am looking for input!

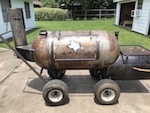
Here is a picture of the tank I bought that will serve as the CC. I am in the market for another one to cut in half to make into the firebox.
250 Gallon Tank 1.jpeg
I am in the process of modeling the smoker in Fusion 360. Here is a quick clip of me rotating the camera around to show how I have thing set up. You will see that I am doing an insulated firebox. You’ll see its a work on progress, I haven’t modeled the doors, handles, etc.

[youtube]https://youtu.be/C9XoZxsAl0k[/youtube]

Some quick dimensions:

Cook Chamber tank
-diameter: 30”
-length: 94” (tip to tip) grates will only be weld to weld though

Firebox:
-metal thickness: 1/4 inch (all)
-outside wall diameter: 30”
-inside wall diameter 26”
-insulation: 1.5”
-length: 36”

Smoke Stack:
-diameter: 6”
-length: 46” (12” to top of CC, 34” above that)
Starting position: grate height

I used the PitCalculator on this site to plan out my dimensions.

Here are my results:
PitCalc Results.png


Specific Questions:

Smoke Stack:
1. It appears that the calculator assumes the smoke stack comes out of the top of the smoker. I have read that it is better to have it at grate height which is how I’m planning on doing mine. The calc gave me a 34” height for my 6” diameter stack. I kept the top of the stack where the calc said (34” above the top of my CC) but just extended it down to grate height. Is that correct or do I need to reduce the height to 34” above grate height?

2. Should I put some type of damper in the stack? I have seen these on several pits but not sure what they are for.

3. Do I need to have some type of cover for the stack in the event I’m smoking in the rain?


Firebox:
1. The calculator gave me the size for my firebox, about 1/3 of my cooker size. Since I am using an insulated firebox I used the inside dimensions (26” by 36”). Do I need to make adjustments to this because my firebox will be insulated? I have read that no adjustments need to be made, it just burns less fuel but want to confirm.

2. The calc also gave me the area needed for the throat. Is it a good idea to have some type of plate to adjust / lessen this to decrease airflow during the cook?

3. Firebox placement: See the below 2 cut-outs of the throat and the firebox placement. I located the firebox 7.5” horizontally from the weld (the start of the grates). The top of the outside of the firebox is at the vertical middle of the tank. This keeps the firebox as low and as far away from the grates as possible while still giving me the ~150in^2 of throat area. My goal was to reduce the hot spot on the grates near the firebox. Is this the optimal way to place this? Any suggested changes?

Firebox Placement
Firebox Placement.png
Throat from CC
Throat from CC.png
4. I was planning on leaving the door cracked when I’m smoking as opposed to having vents in the door to control airflow but this may not be the best way to do it. Any thoughts from past experience? I am open.


Cook Chamber:
1. I have read that a water pan is necessary to use with offsets. If so I was thinking of putting it right by the firebox in the round dome of the CC. Is there an optimal place to put it? Do I need 1 or more than 1?

2. Baffle Plate - I have seen some offsets that have a small baffle plate by the firebox throat. Should I plan on putting one on mine? Are they necessary?

3. Do I need to use stainless steel expanded metal for the grates or do most people use mild steel?


Please feel free to comment with suggestions or design tweaks!

Thank you in advance for each of your replies. I am looking forward to this build and to doing my first cook!

JM


Sign Up For SmokerBuilderU
User avatar
Dirtytires
Expert
Expert
Posts: 3845
Joined: November 24th, 2015, 12:36 am
Title: It ain't broke...yet
BBQ Comp Team Name: Dont compete...cook for events once in a while
Location: Phoenix, Az

Re: First offset build! Have some questions

Post by Dirtytires » July 27th, 2020, 10:37 pm

Welcome to the group.

First off, glad you kept your post short....sorry, couldn’t resist.

The calculator gives chimney length from top of cook chamber. If you choose extend it down to the grate (and I don’t recommend it), you ignore that length and still add the chimney length as indicated from the top of the cook chamber. I have a damper on mine. Keeps the cook chamber better sealed from dust/dirt when not in use and can be used to choke off the exhaust a bit if needed. Your choice to add but I don’t think you will regret the minimal extra work to put one on.

You are correct, do not make adjustments to firebox size based on insulation.

A damper on the throat is usually not used. I put one in mine so I could close my cook chamber off and direct all heat to my warmer box only in the case I wanted to cook only in the warmer box. However, it is not the best method to reduce heat to the cook chamber as it is best to control the fire air intake instead and to be honest, I don’t ever use it.

Cook chamber placement is fine. No matter what you do, expect to loose about 18 inches of you grate space next to the fire as it will be too hot. A shadow plate is recommended but it’s still going to be hot.

I tweak my air intakes sometimes just 0.25 sq inches at a time. Can you do that with a door? Is your placement repeatable so you can get it back when you add more wood? Also, keep in mind air intakes are mounted below the fire so increase efficiency and decrease needless heat loss out an open door...why insulate it if you are going to leave the door open? I would put intakes in now. If you somehow decide an open door is better you can always use the door but it’s a lot more work to add intakes on an insulated firebox down the road.

I have used water pans in my early years cause I thought you had to...probably read the same article where you got the information. I did some experiment cooks a number of years ago and came to the conclusion they are completely unnecessary. I live in the Phoenix desert where our humidity is in the 8-15% range for much of the year and never have an issue with a dry cook chamber. Some have had success using them for a heat sink to minimize the hot zone just outside the firebox but I don’t think they are needed to cook with.

Yes, use a shadow plate. (A baffle plate is used in a reverse flow smoker to push the heat to the opposite end of the cook chamber. A shadow plate is different and is typically 12-18” long to help flatten out the hot zone.)

Stainless is completely unnecessary unless you are a business and required by local food handling regulations. 99% of the pits bolt on this site are standard carbon steel.

——————————————————

I probably added more confusion to your already hectic plans....sorry! They are my opinions and you are free to dismiss any or all of them without hurting my feelings. I’m sure someone will be along soon to argue some or all the points I’ve just made but that is what makes this fun. Feel free to ask as many questions as you want as it’s easier to change things now!

Good luck!


dacolson

Re: First offset build! Have some questions.

Post by dacolson » July 28th, 2020, 12:05 am

Welcome! Dirtytires has got you heading in the right direction ... for the most part, lol. I have my stack built at grate level - with a smoke collector - on both my builds. One’s a reverse flow, the other’s a standard offset. Both draft well and lay done a lot of smoke on the meat. And, there’s no condensation dripping down the stack potentially onto the meat.

There, DT. You happy? Now you can argue. =))


User avatar
Pete Mazz
Administrator
Administrator
Posts: 3399
Joined: February 16th, 2013, 8:19 am
Title: Meathead
Location: Bucks County, PA

Re: First offset build! Have some questions.

Post by Pete Mazz » July 28th, 2020, 3:10 am

A RF smoker is much easier to maintain consistent temps. If you build a standard offset, I highly recommend tuning plates so you can adjust the side to side temps. Franklins works obviously but keep in mind he has full time pitmasters tending them day and night.


If it's tourist season, how come I can't shoot 'em?

Don't speak the language? Try this: Smoker Terminology

Try my SmokerBuilder Calculators

User avatar
towtruck
Expert
Expert
Posts: 1229
Joined: August 4th, 2018, 4:50 pm

Re: First offset build! Have some questions.

Post by towtruck » July 28th, 2020, 11:32 am

Myself I would lower your FB to CC. You only need a dam across the bottom and that two inches you have there would be better served as an opening and lower the heat down in the CC. Also, If you are not set on a round FB a square box will drop that fb even more and keep the same sq" opening.


User avatar
hogaboomer
Expert
Expert
Posts: 919
Joined: July 15th, 2019, 9:47 am
Title: old pipe welder
BBQ Comp Team Name: Not competing yet...
Location: Groves, TX.

Re: First offset build! Have some questions.

Post by hogaboomer » July 28th, 2020, 6:47 pm

I did one firebox like your picture. It works great. I may have put it 1 inch down from center of cook chamber.
I put a plate fitted to the inside of the end cap right at the top of the throat, angled down a little till it meets up with the tuning plates at 6 inches below the grill.
Then, I welded a 3 inch wide plate across the front of that plate and made it my water pan. It sits right on top of the throat, and catches all the heat straight from the fire box and directs it over to the tuning plates. It's only the second smoker I've built, but it cooks really nice.
I'm building another smaller one with the same design right now. I got the firebox welded on and cut the throat out today.


I live on Hogaboom Road.

User avatar
thejm
Needs more Steel
Needs more Steel
Posts: 126
Joined: July 23rd, 2020, 7:45 pm

Re: First offset build! Have some questions

Post by thejm » July 29th, 2020, 8:21 am

Thank you for your detailed responses! You actually removed a lot of the confusion rather than adding to it. I appreciate it!
Dirtytires wrote:
July 27th, 2020, 10:37 pm

The calculator gives chimney length from top of cook chamber. If you choose extend it down to the grate (and I don’t recommend it), you ignore that length and still add the chimney length as indicated from the top of the cook chamber. I have a damper on mine. Keeps the cook chamber better sealed from dust/dirt when not in use and can be used to choke off the exhaust a bit if needed. Your choice to add but I don’t think you will regret the minimal extra work to put one on.
Thanks for the clarification, looks like I have it designed correctly. also, ill plan on adding a damper.
Dirtytires wrote:
July 27th, 2020, 10:37 pm

A damper on the throat is usually not used. I put one in mine so I could close my cook chamber off and direct all heat to my warmer box only in the case I wanted to cook only in the warmer box. However, it is not the best method to reduce heat to the cook chamber as it is best to control the fire air intake instead and to be honest, I don’t ever use it.
Makes sense.
Dirtytires wrote:
July 27th, 2020, 10:37 pm

Cook chamber placement is fine. No matter what you do, expect to loose about 18 inches of you grate space next to the fire as it will be too hot. A shadow plate is recommended but it’s still going to be hot.
Can you possibly take a picture fo your shadow plate? Id like to see how you did it.
Dirtytires wrote:
July 27th, 2020, 10:37 pm

Stainless is completely unnecessary unless you are a business and required by local food handling regulations. 99% of the pits bolt on this site are standard carbon steel.
Thanks! How do people handle the rust when not in use for a couple months?
Last edited by thejm on July 29th, 2020, 8:29 am, edited 1 time in total.


User avatar
thejm
Needs more Steel
Needs more Steel
Posts: 126
Joined: July 23rd, 2020, 7:45 pm

Re: First offset build! Have some questions.

Post by thejm » July 29th, 2020, 8:27 am

dacolson wrote:
July 28th, 2020, 12:05 am
Welcome! Dirtytires has got you heading in the right direction ... for the most part, lol. I have my stack built at grate level - with a smoke collector - on both my builds. One’s a reverse flow, the other’s a standard offset. Both draft well and lay done a lot of smoke on the meat. And, there’s no condensation dripping down the stack potentially onto the meat.

There, DT. You happy? Now you can argue. =))
Thats a really good point about the condensation. Thanks.
Pete Mazz wrote:
July 28th, 2020, 3:10 am
A RF smoker is much easier to maintain consistent temps. If you build a standard offset, I highly recommend tuning plates so you can adjust the side to side temps. Franklins works obviously but keep in mind he has full time pitmasters tending them day and night.
Ya I actually plan on staying up all night and watching the fire. Call me naive but I think I will really enjoy the cooking process. I really related to Franklins approach to enjoying the process and not just hitting a button on a grill and BBQ popping out.

I will consider the tuning plates. I think im going to start with just a shadow plate, do a few cooks, monitor the temps, and add tuning plates accordingly. This cooker is big obviously and I dont think I will max its capacity out very often so while ld like to have consistent temps accross, Im building the grill big so that I have some wiggle room to account for that.


User avatar
thejm
Needs more Steel
Needs more Steel
Posts: 126
Joined: July 23rd, 2020, 7:45 pm

Re: First offset build! Have some questions.

Post by thejm » July 29th, 2020, 8:39 am

towtruck wrote:
July 28th, 2020, 11:32 am
Myself I would lower your FB to CC. You only need a dam across the bottom and that two inches you have there would be better served as an opening and lower the heat down in the CC. Also, If you are not set on a round FB a square box will drop that fb even more and keep the same sq" opening.
So if I am understanding you correctly, you are trying to eliminate the 2" from bottom of throat to bottom of CC. In order to do that I think id have to add a plate as shown in the below picture due to the fact that the end cap of the tank is rounded.
Firebox Placement connecting plate.pdf
(228.05 KiB) Downloaded 91 times
Does that show your idea correctly?


User avatar
towtruck
Expert
Expert
Posts: 1229
Joined: August 4th, 2018, 4:50 pm

Re: First offset build! Have some questions.

Post by towtruck » July 29th, 2020, 9:27 am

thejm wrote:
July 29th, 2020, 8:39 am
towtruck wrote:
July 28th, 2020, 11:32 am
Myself I would lower your FB to CC. You only need a dam across the bottom and that two inches you have there would be better served as an opening and lower the heat down in the CC. Also, If you are not set on a round FB a square box will drop that fb even more and keep the same sq" opening.
So if I am understanding you correctly, you are trying to eliminate the 2" from bottom of throat to bottom of CC. In order to do that I think id have to add a plate as shown in the below picture due to the fact that the end cap of the tank is rounded.

Firebox Placement connecting plate.pdf

Does that show your idea correctly?
That filler plate may or may not be needed. I just looked at your original drawing and saw the extra 2" of material around the bottom half. A dam at the very bottom is all that is needed. By cutting out most of that 2" lip you could lower the opening and keep the same sq" size.


User avatar
Dirtytires
Expert
Expert
Posts: 3845
Joined: November 24th, 2015, 12:36 am
Title: It ain't broke...yet
BBQ Comp Team Name: Dont compete...cook for events once in a while
Location: Phoenix, Az

Re: First offset build! Have some questions.

Post by Dirtytires » July 29th, 2020, 11:01 am

Sorry, no way to get a picture of my shadow plate. It’s tucked in behind the firebox and covered in soot...not going to be able to see anything.

I screwed up and didn’t put it in during construction so had to wiggle it in thru the throat because I didn’t want to cut into my baffle plate. Most times a shadow plate is just a heavy plate that starts at the throat and extents horizontally into the cook chamber for 10-18 inches. The purpose is to even out the hot blast from the fire as it enters the cook chamber.


User avatar
thejm
Needs more Steel
Needs more Steel
Posts: 126
Joined: July 23rd, 2020, 7:45 pm

Re: First offset build! Have some questions.

Post by thejm » July 29th, 2020, 1:33 pm

Dirtytires wrote:
July 29th, 2020, 11:01 am
Sorry, no way to get a picture of my shadow plate. It’s tucked in behind the firebox and covered in soot...not going to be able to see anything.

I screwed up and didn’t put it in during construction so had to wiggle it in thru the throat because I didn’t want to cut into my baffle plate. Most times a shadow plate is just a heavy plate that starts at the throat and extents horizontally into the cook chamber for 10-18 inches. The purpose is to even out the hot blast from the fire as it enters the cook chamber.
Thanks. I think I can figure this out.


User avatar
Big T
Moderator
Moderator
Posts: 6897
Joined: September 1st, 2013, 2:40 pm
Title: Go Getter
BBQ Comp Team Name: Backyard Boys
Location: Lower Alabama

Re: First offset build! Have some questions.

Post by Big T » July 29th, 2020, 6:15 pm

If you look in the smoker terminology section there's a picture in there that has an explanation of a shadow plate. It's in a RF smoker but it'll work the same in a traditional offset.


Measure Twice.....Cut Three Times.

dacolson

Re: First offset build! Have some questions.

Post by dacolson » July 29th, 2020, 6:32 pm

Mankussm has a pic in his current build thread: http://www.smokerbuilder.com/forums/vie ... =11&t=7581
Most of the way to the bottom of the first page of the thread. He calls it a ghost plate but it’s the same idea.


User avatar
thejm
Needs more Steel
Needs more Steel
Posts: 126
Joined: July 23rd, 2020, 7:45 pm

Re: First offset build! Have some questions.

Post by thejm » July 30th, 2020, 10:23 pm

dacolson wrote:
July 29th, 2020, 6:32 pm
Mankussm has a pic in his current build thread: http://www.smokerbuilder.com/forums/vie ... =11&t=7581
Most of the way to the bottom of the first page of the thread. He calls it a ghost plate but it’s the same idea.
Thanks that was a good picture of it.

BTW i forgot to ask. Whats the best material to use for insulation?

Also for hinges i have seen people use what looks like metal rod and metal pipe. What did yall use for your hinges?


dacolson

Re: First offset build! Have some questions.

Post by dacolson » July 30th, 2020, 10:48 pm

3/8” rod and 1/2” OD tube. Usually grab it at HD or Menards. Pretty simple to put together.
I’ve used barrel hinges as well. Pick them up at Toll Gas where I swap my welding gas tanks. I just like the look of the hand made rod/tube setups better.


User avatar
Dirtytires
Expert
Expert
Posts: 3845
Joined: November 24th, 2015, 12:36 am
Title: It ain't broke...yet
BBQ Comp Team Name: Dont compete...cook for events once in a while
Location: Phoenix, Az

Re: First offset build! Have some questions.

Post by Dirtytires » July 31st, 2020, 10:57 am

Insulation can be any material that is heat rated in the 2000 degree range. Many here use Roxul or a ceramic insulation. Do a quick search of “high temp insulation” to get some ideas. I Chose to use a ceramic insulation because I found a 1” thick material that had same r-value of the 2” thick Roxul and was able to make my firebox just a bit less bulky looking.

Hinges are builders choice. We have seen everything from complicated custom hinges to old door hinges. I used a large bullet hinge because I liked the low profile of it and the ability to remove all my doors should they need to be. Whatever you use, make sure it is sturdy and reliable as your door (especially with a counterweight) can weigh a few hundred pounds and will get irritating if it does not work properly every time you use it.


User avatar
thejm
Needs more Steel
Needs more Steel
Posts: 126
Joined: July 23rd, 2020, 7:45 pm

Re: First offset build! Have some questions.

Post by thejm » July 31st, 2020, 11:02 am

Dirtytires wrote:
July 31st, 2020, 10:57 am
Insulation can be any material that is heat rated in the 2000 degree range. Many here use Roxul or a ceramic insulation. Do a quick search of “high temp insulation” to get some ideas. I Chose to use a ceramic insulation because I found a 1” thick material that had same r-value of the 2” thick Roxul and was able to make my firebox just a bit less bulky looking.

Hinges are builders choice. We have seen everything from complicated custom hinges to old door hinges. I used a large bullet hinge because I liked the low profile of it and the ability to remove all my doors should they need to be. Whatever you use, make sure it is sturdy and reliable as your door (especially with a counterweight) can weigh a few hundred pounds and will get irritating if it does not work properly every time you use it.
dacolson wrote:
July 30th, 2020, 10:48 pm
3/8” rod and 1/2” OD tube. Usually grab it at HD or Menards. Pretty simple to put together.
I’ve used barrel hinges as well. Pick them up at Toll Gas where I swap my welding gas tanks. I just like the look of the hand made rod/tube setups better.

Thank you both. Ill probably do custom ones. I have seen people weld another metla plate to the back of their firebox door as shown in the below picture. Will i need some way of making sure the smoker doors hold their shape? Like a crossbar? or is that unnecessary?

Firebox Door example:
1623920C-F08B-41A6-9989-5716F0A01A2B_1_105_c.jpeg


dacolson

Re: First offset build! Have some questions.

Post by dacolson » July 31st, 2020, 11:40 am

On the door - I would add a cross bar per the pic above. I did not on my first. I built my vents into the door which got in the way of cross bars. I get some warpage. Even on 1/4" plate. It settles down once my temps come into range but it makes airflow control a little less predictable.


User avatar
thejm
Needs more Steel
Needs more Steel
Posts: 126
Joined: July 23rd, 2020, 7:45 pm

Re: First offset build! Have some questions.

Post by thejm » July 31st, 2020, 12:53 pm

dacolson wrote:
July 31st, 2020, 11:40 am
On the door - I would add a cross bar per the pic above. I did not on my first. I built my vents into the door which got in the way of cross bars. I get some warpage. Even on 1/4" plate. It settles down once my temps come into range but it makes airflow control a little less predictable.
Did you experience any warping on your cooker doors? Are they braced somehow other than with the straps?


User avatar
mp4
Expert
Expert
Posts: 1263
Joined: September 2nd, 2014, 6:28 pm
Title: Independent Thinker
BBQ Comp Team Name: Just a few backyard for fun competitions.
Location: Central Wisconsin

Re: First offset build! Have some questions.

Post by mp4 » July 31st, 2020, 12:55 pm

So I'll just read an article this morning that Frank put out that spelled out the differences in operation between a reverse flow and a conventional (Texas style) offset. I learned a lot in a short time...do you think I can find it now...heck NO!

Turns out a conventional cooks from the top down and lends itself towards a higher firebox and a lower chimney location....I'll keep looking for a reference to it and get back to you.


User avatar
thejm
Needs more Steel
Needs more Steel
Posts: 126
Joined: July 23rd, 2020, 7:45 pm

Re: First offset build! Have some questions.

Post by thejm » July 31st, 2020, 1:02 pm

mp4 wrote:
July 31st, 2020, 12:55 pm
So I'll just read an article this morning that Frank put out that spelled out the differences in operation between a reverse flow and a conventional (Texas style) offset. I learned a lot in a short time...do you think I can find it now...heck NO!

Turns out a conventional cooks from the top down and lends itself towards a higher firebox and a lower chimney location....I'll keep looking for a reference to it and get back to you.
I would love to read that if you can find it. He has such an incredible attention to detail and usually has insights that most others done have


User avatar
Dirtytires
Expert
Expert
Posts: 3845
Joined: November 24th, 2015, 12:36 am
Title: It ain't broke...yet
BBQ Comp Team Name: Dont compete...cook for events once in a while
Location: Phoenix, Az

Re: First offset build! Have some questions.

Post by Dirtytires » July 31st, 2020, 1:34 pm

Unlike the firebox, Cook chamber door won’t need to be braced as the cook chamber is only going to be at 250 degrees for smoking. If you turn your cook chamber into a grill, warpage could become an issue depending on material, thickness and temps.


dacolson

Re: First offset build! Have some questions.

Post by dacolson » July 31st, 2020, 4:26 pm

Dirtytires wrote:
July 31st, 2020, 1:34 pm
Unlike the firebox, Cook chamber door won’t need to be braced as the cook chamber is only going to be at 250 degrees for smoking. If you turn your cook chamber into a grill, warpage could become an issue depending on material, thickness and temps.
:yth:
No door warpage.


User avatar
Pete Mazz
Administrator
Administrator
Posts: 3399
Joined: February 16th, 2013, 8:19 am
Title: Meathead
Location: Bucks County, PA

Re: First offset build! Have some questions.

Post by Pete Mazz » August 1st, 2020, 4:47 am

thejm wrote:
July 31st, 2020, 1:02 pm
mp4 wrote:
July 31st, 2020, 12:55 pm
So I'll just read an article this morning that Frank put out that spelled out the differences in operation between a reverse flow and a conventional (Texas style) offset. I learned a lot in a short time...do you think I can find it now...heck NO!

Turns out a conventional cooks from the top down and lends itself towards a higher firebox and a lower chimney location....I'll keep looking for a reference to it and get back to you.
I would love to read that if you can find it. He has such an incredible attention to detail and usually has insights that most others done have
https://smokerbuildermfg.com/blogs/news ... PVOnMgzsE8


If it's tourist season, how come I can't shoot 'em?

Don't speak the language? Try this: Smoker Terminology

Try my SmokerBuilder Calculators

Post Reply
  • Similar Topics
    Replies
    Views
    Last post

Return to “Standard Offsets”