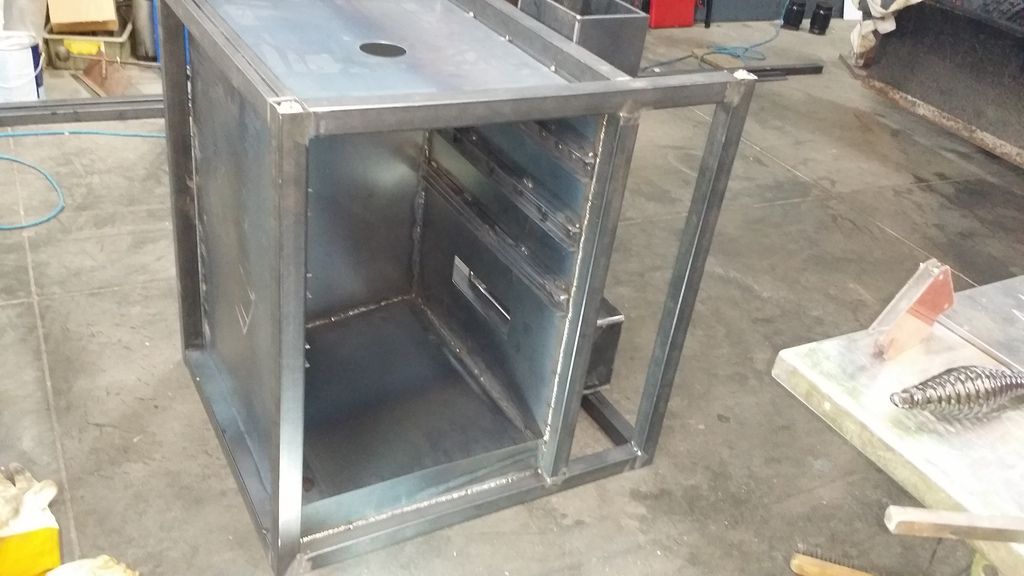
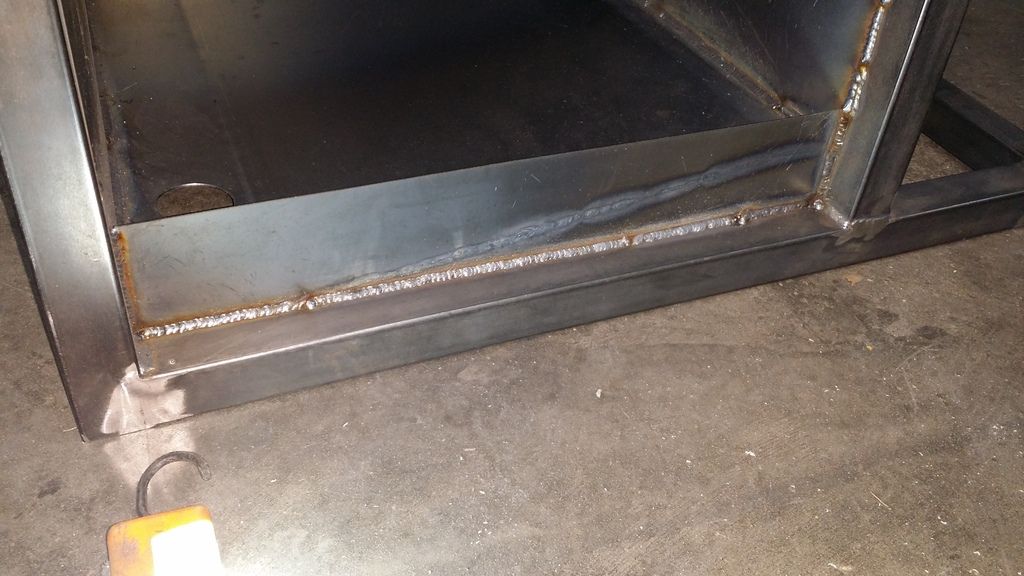
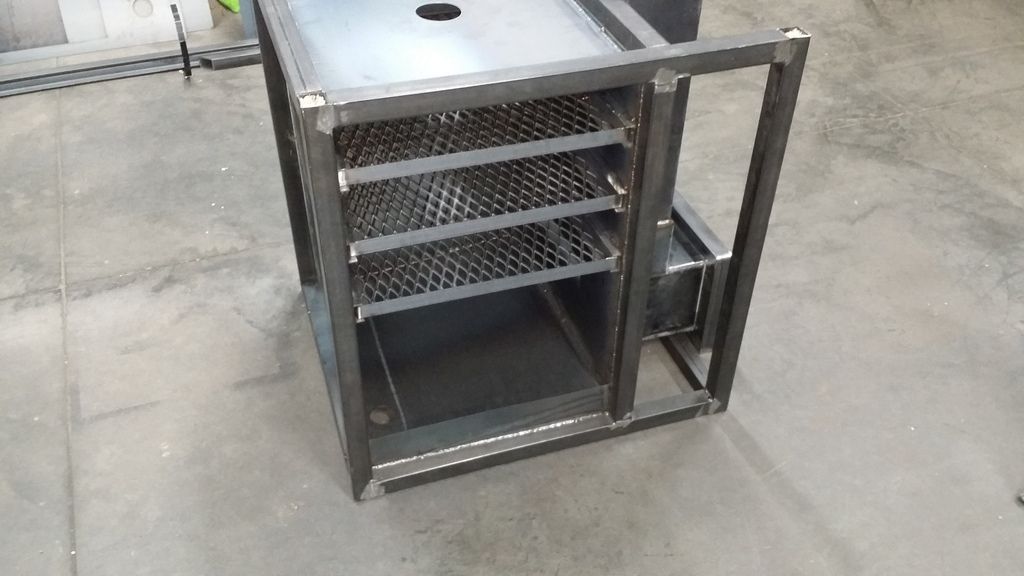
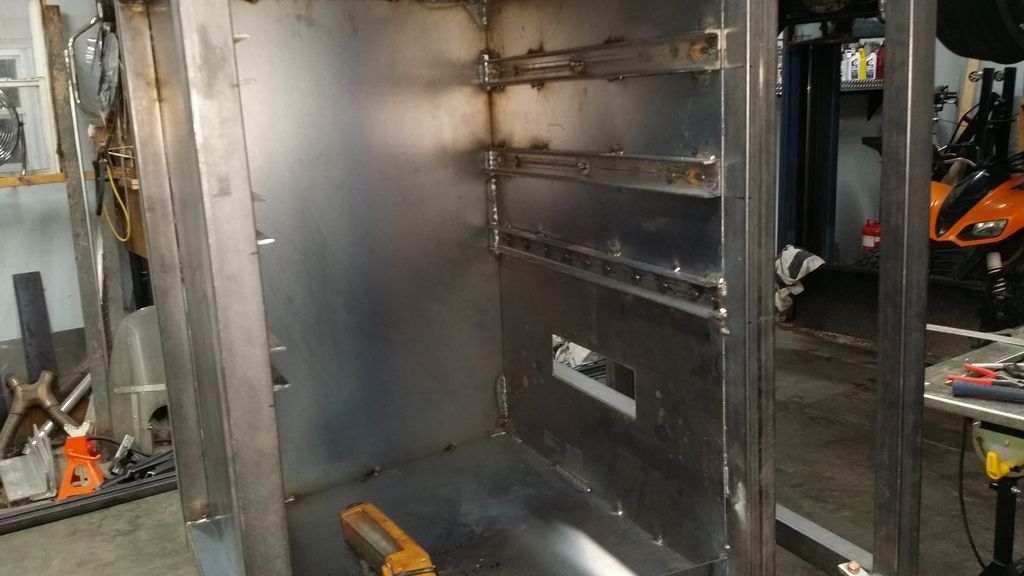
Build thread, mini gravity fed smoker.

Smoker Clones are your own version of a commercially available Smoker. Examples are Stumps, Jambo, Backwoods, or any other you want to try to copy.
scottyk
Just Got in trouble for buying tools
Posts: 43
Joined: September 22nd, 2015, 1:50 pm

Build thread, mini gravity fed smoker.

Post by scottyk » October 21st, 2015, 10:09 am

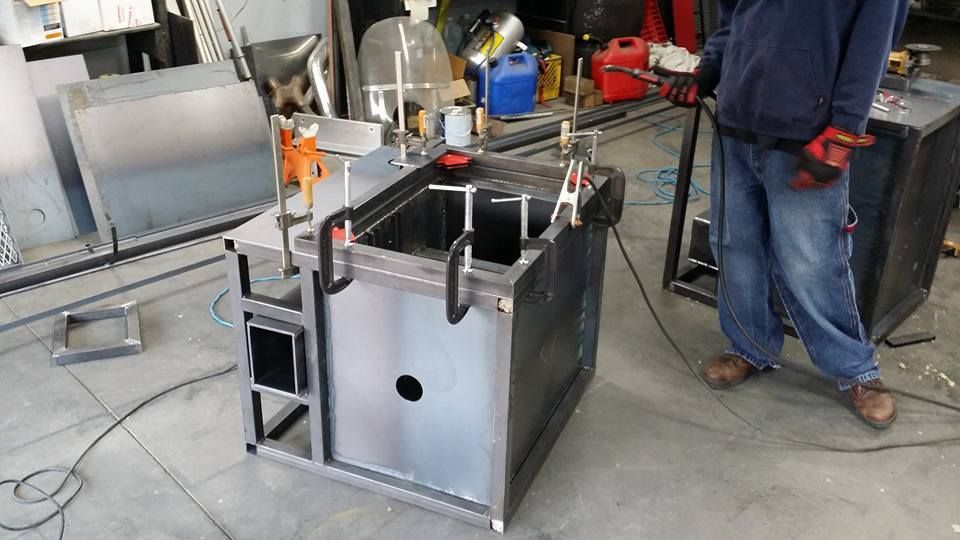
Hey everyone just wanted to share a sort of half-assed build log of our smokers. My buddy and I decided to go ahead and pull the trigger and build 2 of these mini smokers from plans purchased on smokerplans.net. This has turned out to be one heck of a fabrication project, more than I had initially bargained for but Im used to that. Little bit of background I have been around race cars and fabrication for quite some years now, I have a small shop with a plasma cutter, TIG welder, and we borrowed a MIG welder to help this process along. So I am somewhat experienced with generally fab practices. Got about 1100 lbs of steel ordered to start out, ended up being too much material as I have a full extra 22' stick of 1.5 square and 3/4 angle.

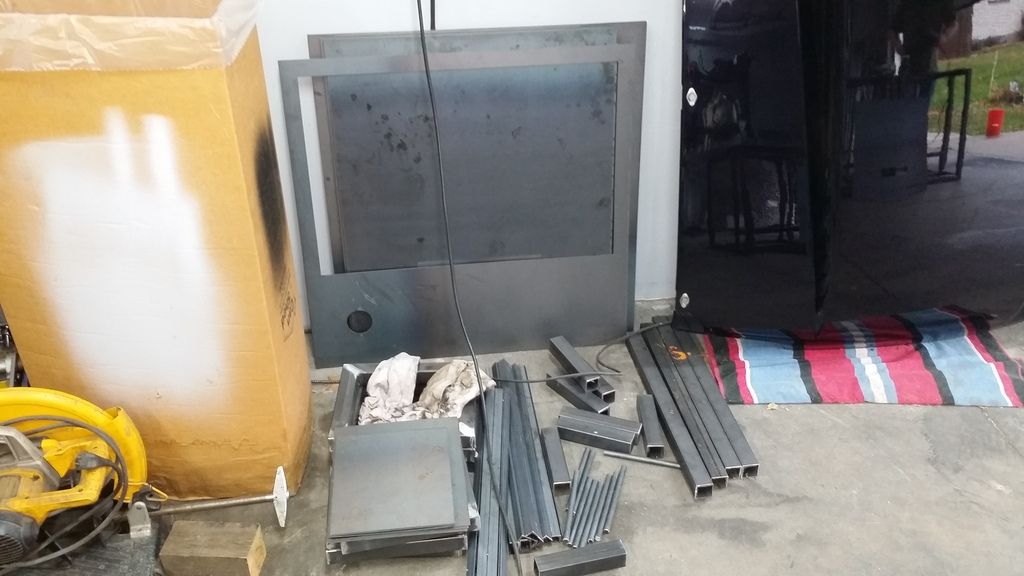
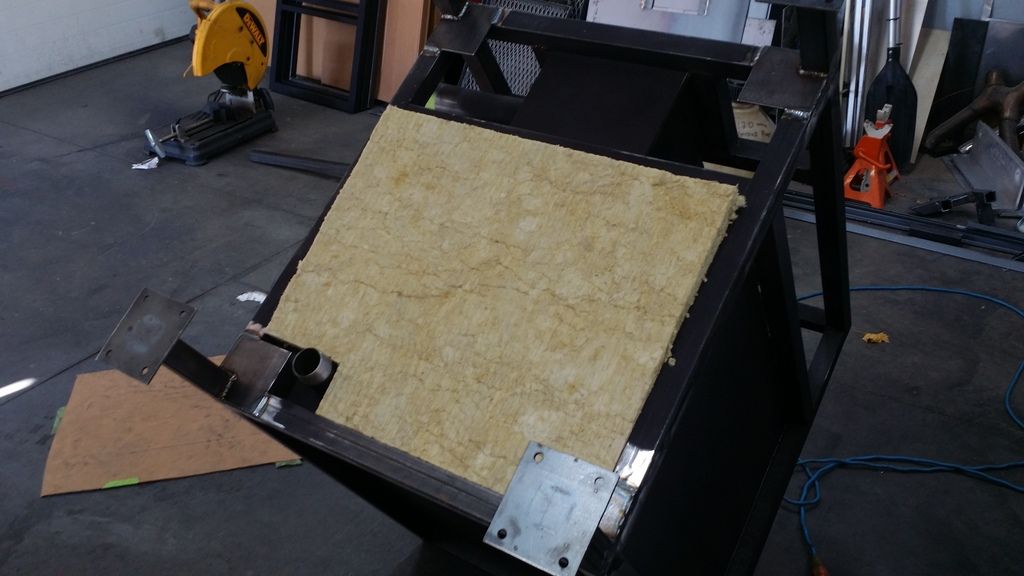
Spent a better part of a saturday cutting tubing and angle, 3 people, about 7 hours later and it was basically all cut and edges dressed. I noticed that filling the tubes with insulation was optional, and being I did not have the roxul insulation yet I simply purchased blow-in style insulation and filled a 5 gallon bucket and started stabbing tubes into the insulation untill they were packed full. I hope the insulation will hold up but being its optional I figure it wont be the end of the world either way.
Image

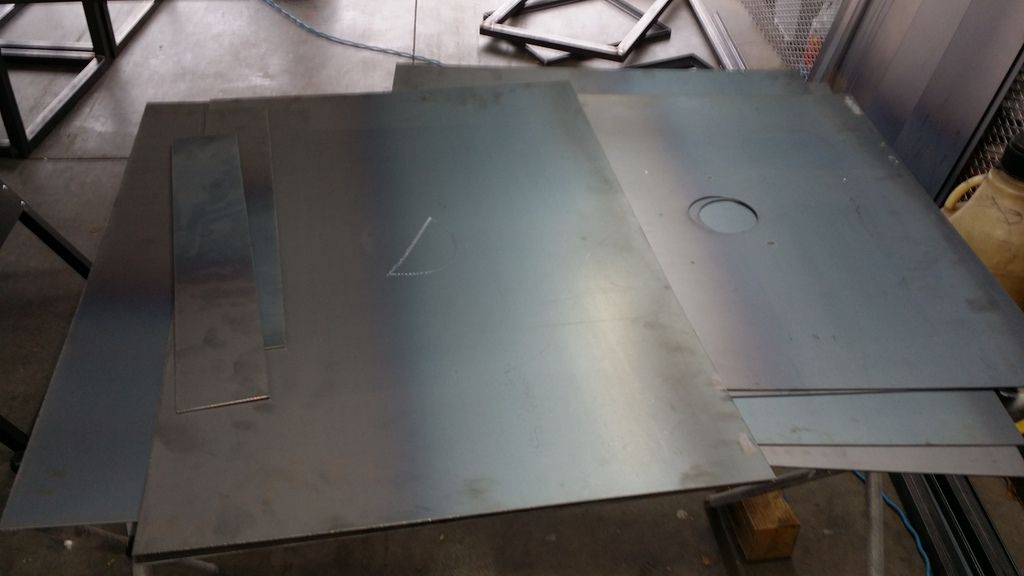
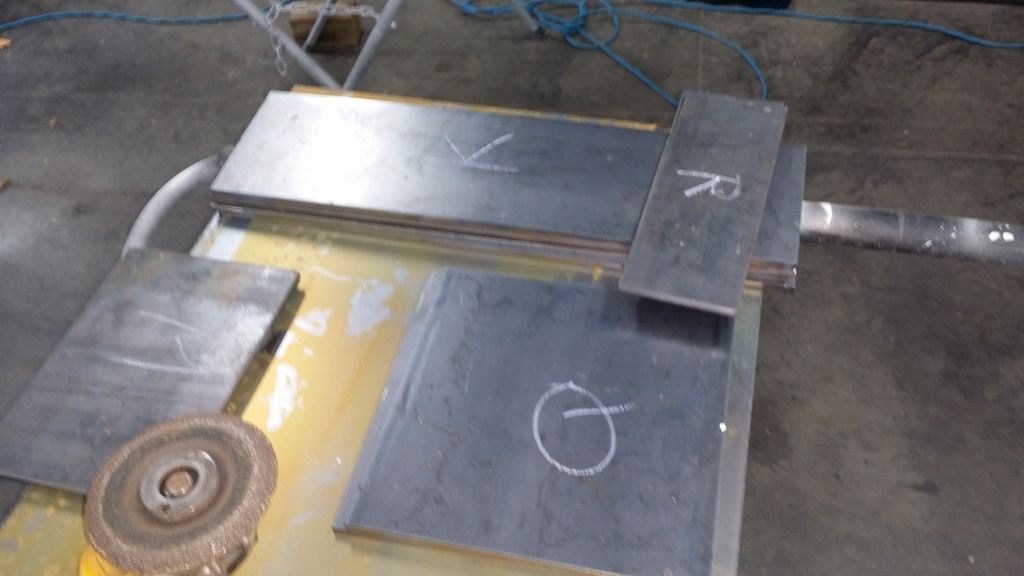
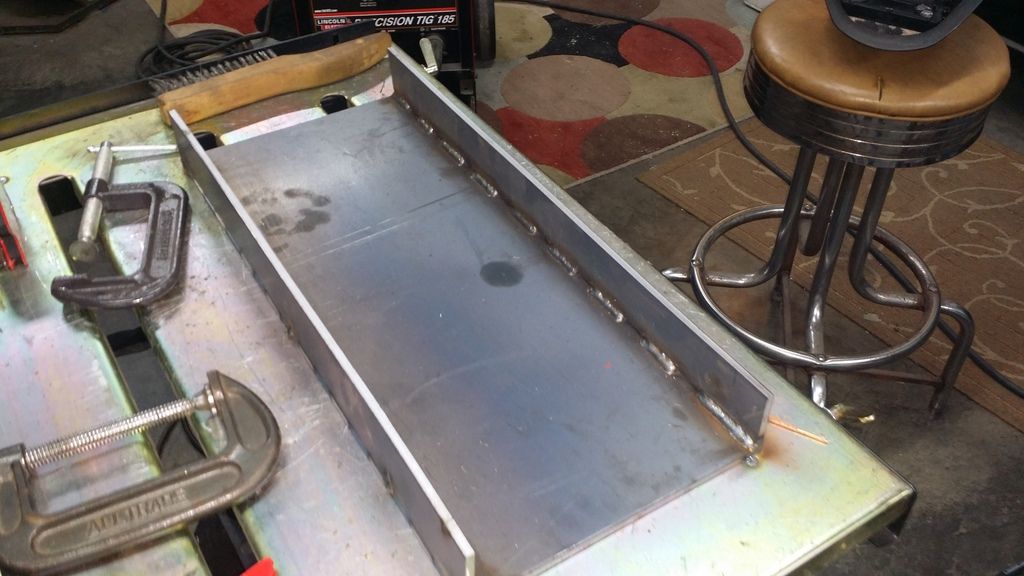
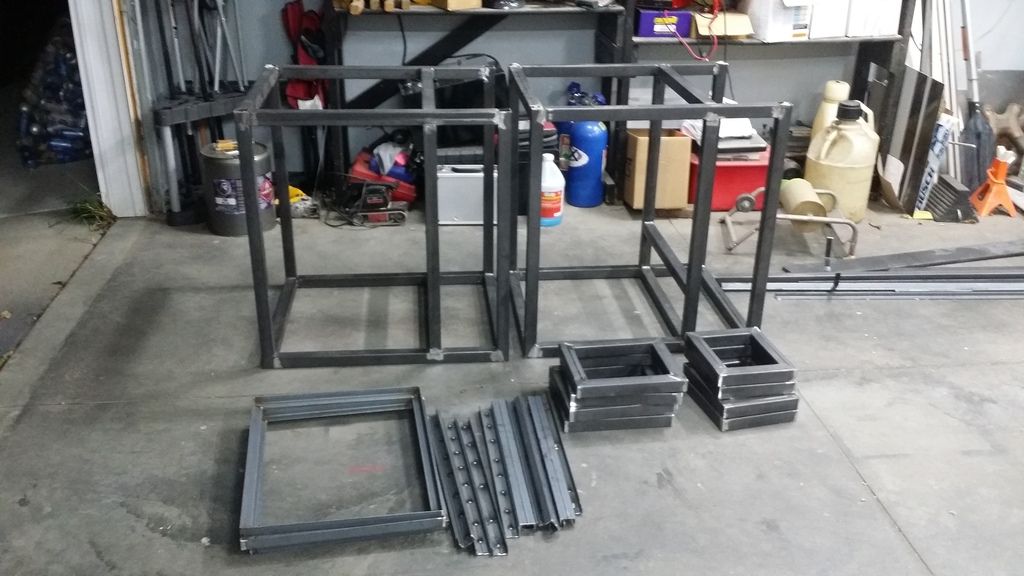
We still had some extra time and we made great progress so after a quick pizza delivery and a beer break we started welding, ended up with 2 nearly complete frames, door curbs, and partially completed racks and slides. I was very impressed with our productivity for 1 day to say the least. We sent the sheetmetal out to a local dude who does cnc plasma cutting in his garage "found him on craigslist" since the idea of cutting 35+ pieces from 6 sheets of 4x8 sounded very time consuming. and a modest charge of around 120 dollars, 60/piece to have the pieces cut straight and accurately sounds like a deal compared to the alternative. I will have a ton of questions for you guys who have built one already Im sure!
Image


Sign Up For SmokerBuilderU
scottyk
Just Got in trouble for buying tools
Posts: 43
Joined: September 22nd, 2015, 1:50 pm

Re: Build thread, mini gravity fed smoker.

Post by scottyk » October 21st, 2015, 10:17 am

Figured might as well throw this out there already. I am having a dilemma with choosing gaskets to seal the doors, what have you guys had luck with? I am leaning toward using a silicon P-style gasket and simply screwing the internal sheetmetal onto the doors, this will allow us to sandwich the gasket in place. Which I believe is how stumps brand smokers are assembled except they use a tad pole style gasket not a silicon one.

Correct me if Im wrong, but there WILL be am imperfect mating surface due to warpage "specially if fully welding internal sheet to the door frame" and the nomex gaskets do not look like they will have much room for compression make up for this. So what are the real world experiences with this gasket?

Also how is everyone attaching the skins onto the exterior of these? I was thinking of riveting them on so they will be removable and less warpage of the frame overall when compared to a fully welded permanent option.


Thanks guys for the time and let me know if you have questions for me along the way!


User avatar
Big T
Moderator
Moderator
Posts: 6897
Joined: September 1st, 2013, 2:40 pm
Title: Go Getter
BBQ Comp Team Name: Backyard Boys
Location: Lower Alabama

Re: Build thread, mini gravity fed smoker.

Post by Big T » October 21st, 2015, 5:56 pm

They look great so far ! I think most of the guys are welding the skins on but you can rivet or screw them on, it just comes down to the look that you're trying to achieve. I know that Puff uses the flat self adhesive gaskets on all of his builds and he hasn't had any issues with staying in place or sealing off the doors.


Measure Twice.....Cut Three Times.

User avatar
Puff
Expert
Expert
Posts: 2352
Joined: May 29th, 2013, 11:16 pm
Title: Always All In !
Location: New Jersey...Southern New Jersey

Re: Build thread, mini gravity fed smoker.

Post by Puff » October 21st, 2015, 8:54 pm

:yth:

I love that self adhesive flat gasket. I've used the 1/8 X 1" on almost everything. If you find you're getting a larger gap between parts, you can use the 1/4" thick one for greater squeezeability (compression).


Make no mistake, there ain't no powder in this Puff ! And... I'm not really a crazy person but I play one in real life

User avatar
Frank_Cox
Site Admin
Site Admin
Posts: 7160
Joined: January 17th, 2011, 6:30 pm
BBQ Comp Team Name: https://smokerbuilderu.com
Contact:

Re: Build thread, mini gravity fed smoker.

Post by Frank_Cox » October 22nd, 2015, 7:47 am

looks great!!! I think I might have talked to you about the gaskets already via text message. That insulation will work fine for the tubing. it appears to be mineral wool which is the same thing as Roxul just not in sheets.
:beer:


Yona2015
beginner
beginner
Posts: 13
Joined: October 5th, 2015, 7:07 pm
Title: Member
BBQ Comp Team Name: TNT Kickin' BBQ
Location: Eastern KY
Contact:

Re: Build thread, mini gravity fed smoker.

Post by Yona2015 » October 22nd, 2015, 7:57 am

:LG:


Hun? Do you smell something burning??

Certified KCBS BBQ Judge and Table Captain

steffec
beginner
beginner
Posts: 12
Joined: June 15th, 2012, 2:45 pm
Title: Member
BBQ Comp Team Name: Not competing yet...
Location: Minnesota

Re: Build thread, mini gravity fed smoker.

Post by steffec » October 22nd, 2015, 9:00 am

Now that is getting it done! Nice work.


scottyk
Just Got in trouble for buying tools
Posts: 43
Joined: September 22nd, 2015, 1:50 pm

Re: Build thread, mini gravity fed smoker.

Post by scottyk » October 22nd, 2015, 11:42 am

Thanks guys! I will be ordering up the gaskets today along with the bullet hinges. I really do appreciate the input on it since I have been having a hard time making a decision on my own. I like the idea of fitting it for 1/8" gasket and having the option to go to 1/4" if I happen to run into issues. Its nice that Frank makes himself available to answer questions from customers, thanks very much for that! Even puts his phone number right on the instructions.

I think we will be attaching door skins with screws or rivets just to avoid the warpage that comes along with welding. My buddy thats getting the 2nd clone already owns a larger real stumps smoker so I have been comparing along the way and noticed there are only a few places where the sheetmetal is tacked on and use mostly screws to attach it.

Just got word that the sheetmetal is ready to pick up from the plasma cutter dude so Im planning on getting a good start with the firebox/chute and cook chamber this weekend. I will make sure to take some pictures and share with you guys the progress.


User avatar
Puff
Expert
Expert
Posts: 2352
Joined: May 29th, 2013, 11:16 pm
Title: Always All In !
Location: New Jersey...Southern New Jersey

Re: Build thread, mini gravity fed smoker.

Post by Puff » October 22nd, 2015, 9:05 pm

Gizmo told me once how nice it would be building a cooker with all nice clean cut edges....looks like you've got this one going strong


Make no mistake, there ain't no powder in this Puff ! And... I'm not really a crazy person but I play one in real life

scottyk
Just Got in trouble for buying tools
Posts: 43
Joined: September 22nd, 2015, 1:50 pm

Re: Build thread, mini gravity fed smoker.

Post by scottyk » October 23rd, 2015, 1:06 pm

Puff wrote:Gizmo told me once how nice it would be building a cooker with all nice clean cut edges....looks like you've got this one going strong
Well the CNC plasma does leave some slag that will need to be cleaned up with a flap disc or something. We used chop saws to cut all this tubing and its not as accurate or clean as some people give them credit for, every single cut edge on every piece will be touched with the grinder and many of them had to be re-shaped or replaced.

Jury is still out on the CNC cut plasma stuff, I will be picking them up in a few hours so we shall see! I am expecting nice straight edges and very good tolerance on it.


User avatar
Puff
Expert
Expert
Posts: 2352
Joined: May 29th, 2013, 11:16 pm
Title: Always All In !
Location: New Jersey...Southern New Jersey

Re: Build thread, mini gravity fed smoker.

Post by Puff » October 23rd, 2015, 3:47 pm

My chop saw is not totally square either but CNC plasma surely beat the heck out of the 4.5" cutoff wheels

CNC stands for clean nicely cut!


Make no mistake, there ain't no powder in this Puff ! And... I'm not really a crazy person but I play one in real life

scottyk
Just Got in trouble for buying tools
Posts: 43
Joined: September 22nd, 2015, 1:50 pm

Re: Build thread, mini gravity fed smoker.

Post by scottyk » October 23rd, 2015, 4:25 pm

Also I was going to ask you guys another thing. Is there any type of coating you put over the steel on the inside of the smoker? Im not talking inside the cook chamber "I know that gets seasoned and blacked out quick" but Im thinking on the external surfaces of the cook chamber, the tubes, external fire box, and inside of the skins?

Thanks!


User avatar
Puff
Expert
Expert
Posts: 2352
Joined: May 29th, 2013, 11:16 pm
Title: Always All In !
Location: New Jersey...Southern New Jersey

Re: Build thread, mini gravity fed smoker.

Post by Puff » October 23rd, 2015, 9:58 pm

I didn't.... Just painted the outside skin and any exterior exposed pieces.


Make no mistake, there ain't no powder in this Puff ! And... I'm not really a crazy person but I play one in real life

R290
beginner
beginner
Posts: 15
Joined: September 28th, 2015, 10:18 am

Re: Build thread, mini gravity fed smoker.

Post by R290 » October 26th, 2015, 11:19 am

Wondering just how small this unit really is.
Could I get the basic Hight Width and Depth.
Thanks


scottyk
Just Got in trouble for buying tools
Posts: 43
Joined: September 22nd, 2015, 1:50 pm

Re: Build thread, mini gravity fed smoker.

Post by scottyk » October 26th, 2015, 11:26 am

R290 wrote:Wondering just how small this unit really is.
Could I get the basic Hight Width and Depth.
Thanks
Without the wheels, just the square box is 30.5 wide, 32" high, and 26" deep. Not enough for a big party or anything, but great for a moderate size family I would say.


scottyk
Just Got in trouble for buying tools
Posts: 43
Joined: September 22nd, 2015, 1:50 pm

Re: Build thread, mini gravity fed smoker.

Post by scottyk » October 26th, 2015, 11:43 am

Weekend progress pictures. Got a good amount done again, having all the sheetmetal plasma cut was great, more or less like assembling a puzzle and welding into place, the cook chambers took a slight bit of grinding to clear welds in the corners of the frame and other various areas but nothing too serious "so far" I ran out of welding wire in both MIG welders, but finished up 1 cooking chamber and about 1/3 done with the 2nd cooking chamber. Both firebox's are completed with the exception of the Channel that goes into the cooking chamber but I will have that material today since I forgot to order that initially.

I have a baby on the way about any day now... So we're working fast on these trying to get the real labor intensive stuff done before the big day!

CNC plasma cut stuff..
Image
Image
Image
Test fit...
Image
Image
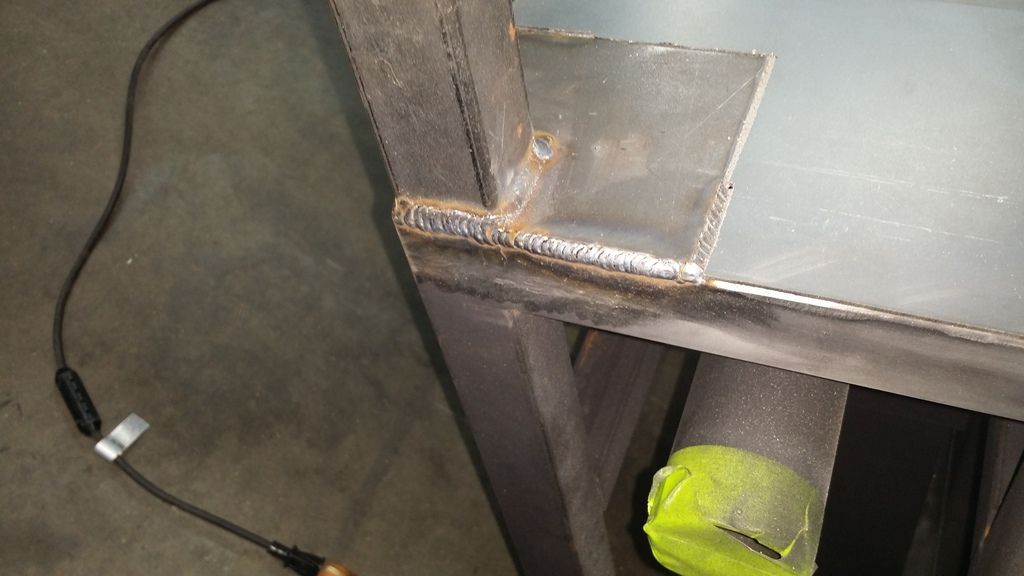
Everyone has to have the pic of that one good weld! lol I usually TIG everything this is the first time in years I've used a MIG
Image
http://s248.photobucket.com/user/427fog ... g.html?o=0
Image

2nd smoker not TOO far behind..
Image


User avatar
Puff
Expert
Expert
Posts: 2352
Joined: May 29th, 2013, 11:16 pm
Title: Always All In !
Location: New Jersey...Southern New Jersey

Re: Build thread, mini gravity fed smoker.

Post by Puff » October 26th, 2015, 9:48 pm

I love seeing these minis under construction.. You are doing a great job on this Scottyk. I have the big gf and have never come close to filling it with meat and have cooked for 40 people. It has more capacity currently than my 275 gallon trailer rig and that cooked 30 plus racks of ribs for 70 plus people. I think the mini will have a minimum of 12 full racks of ribs or more easily.

Looks like your CNC material came out great!! Without prying, was it worth it? Versus buying sheets and cutting it yourself?


Make no mistake, there ain't no powder in this Puff ! And... I'm not really a crazy person but I play one in real life

scottyk
Just Got in trouble for buying tools
Posts: 43
Joined: September 22nd, 2015, 1:50 pm

Re: Build thread, mini gravity fed smoker.

Post by scottyk » October 27th, 2015, 4:34 pm

Puff wrote:I love seeing these minis under construction.. You are doing a great job on this Scottyk. I have the big gf and have never come close to filling it with meat and have cooked for 40 people. It has more capacity currently than my 275 gallon trailer rig and that cooked 30 plus racks of ribs for 70 plus people. I think the mini will have a minimum of 12 full racks of ribs or more easily.

Looks like your CNC material came out great!! Without prying, was it worth it? Versus buying sheets and cutting it yourself?
Thanks a ton man! The plans are actually a life saver, they're spot on! I created this entire smoker in 3d according to plans and it all assembles perfectly, so cut everything to the plans excatly and it WILL fit together with minimum grinding and fitting. There will always be some adjustments as all us fabricators know all too well.

The CNC cutting was worth it to me, I found a guy on craigslist starting out a small business from his garage so the rate was very fair, 135 bucks to cut all the 16 gauge and 1/4" plate, so that was 7 4x8 sheets of 16 gauge and 20' x 10" wide 1/4 thick plate. 35+ parts from the 16 gauge and I dont know how many from 1/4" I think over 20 total. so thats over 50 parts. This is for 2 smokers remember, cuts this stuff faster than using a shear. I have access to software that can lay the parts out and create .dxf files so that might be my saving grace as far as money is concerned since I supplied him with the files. I havent fit the exterior panels yet but so far so good, the cook chamber goes together with only touching up 2 corners really.


User avatar
Puff
Expert
Expert
Posts: 2352
Joined: May 29th, 2013, 11:16 pm
Title: Always All In !
Location: New Jersey...Southern New Jersey

Re: Build thread, mini gravity fed smoker.

Post by Puff » October 27th, 2015, 4:53 pm

I can probably come close to the cutting discs being $55 for me here at about $3.00 each PLUS time and handling...( I can't handle this stuff like I was 45 yrs old anymore) and then to have nice clean edges to work from...AND, its only one smoker. Then consider noise exposure, fatigue and ....

Since I don't use .dxf files, I'll choose to remain blissfully ignorant and try ordering my parts cut from the supply house for the next one. Glad to see its all coming together so well


Make no mistake, there ain't no powder in this Puff ! And... I'm not really a crazy person but I play one in real life

scottyk
Just Got in trouble for buying tools
Posts: 43
Joined: September 22nd, 2015, 1:50 pm

Re: Build thread, mini gravity fed smoker.

Post by scottyk » November 2nd, 2015, 12:23 pm

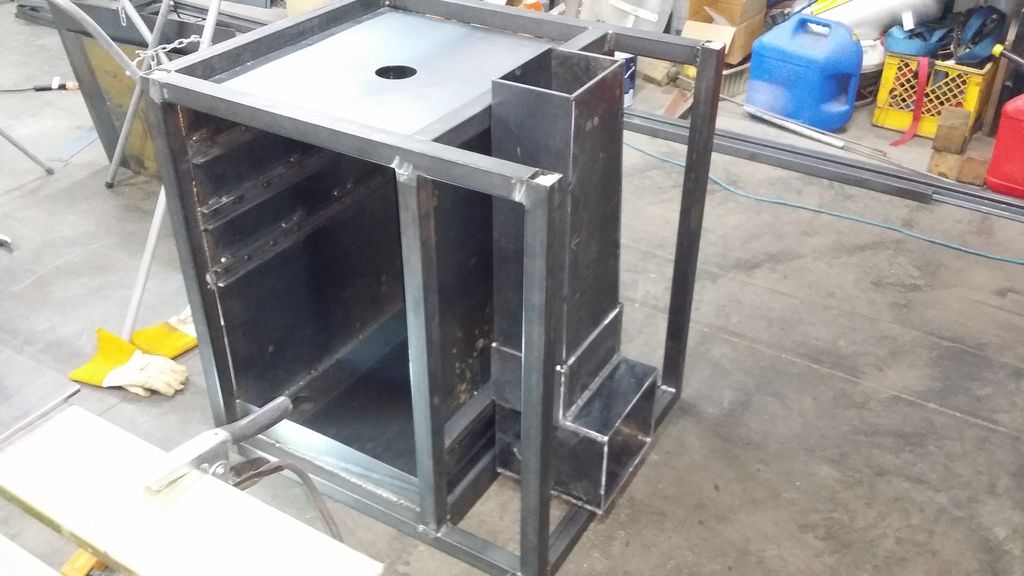
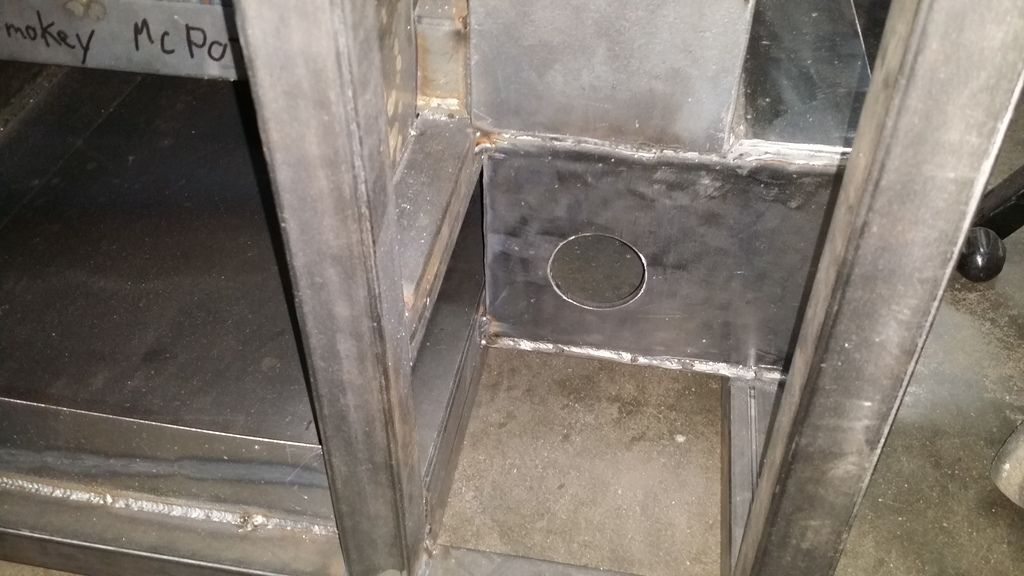
Got a few more updates and lessons learned along the way for you guys... I made the firebox channel out of separate pieces of 1/4" plate welded together. Image

I tipped the cooker on its side and I fit the channel to the cook chamber, then the rest of the firebox was set on top of that. this was a mistake as it turns out, because the firebox is not meant to fit directly against those tubes like shown in this picture. There should be a space between the firebox and those tubes. I had to cut .75" off of the channel which should have been my first indication something wasnt right, but I went with it anyway.
Image

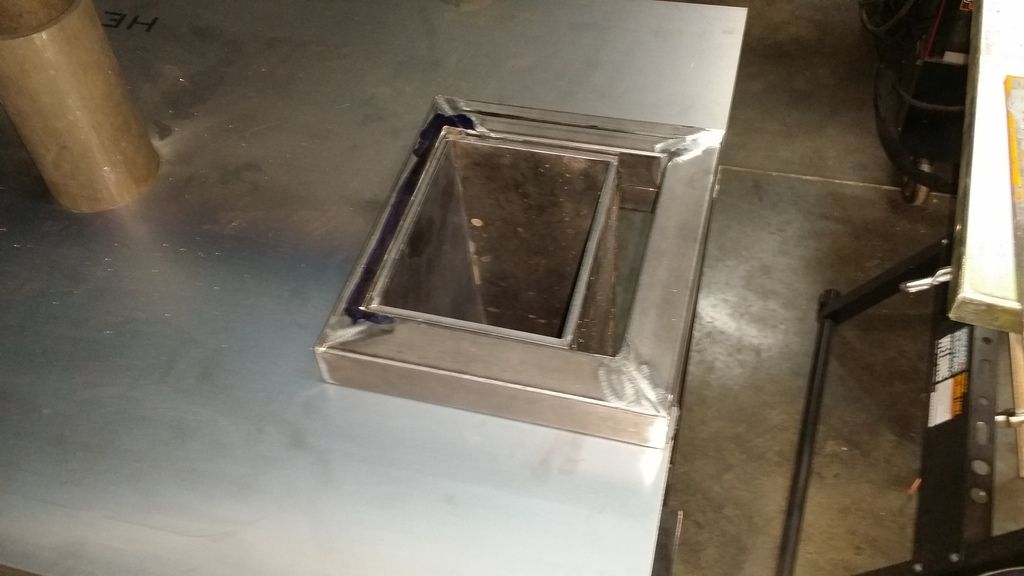
We're insulating the heck out of these things including the space between firebox and cook chamber so I do not feel this will effect the function of the smoker, but it also led to another slight optional modification. Since we wanted the charcoal chute door to be flush with the right side of the smoker we had to move the door curb over .75" (what a coincidence) by doing this.
Image
We still have the 1" wide portion for full gasket area and compression, and the door curb requires spacers between the chute and curb anyway so there really isnt any issues here just a few more minutes of cutting..
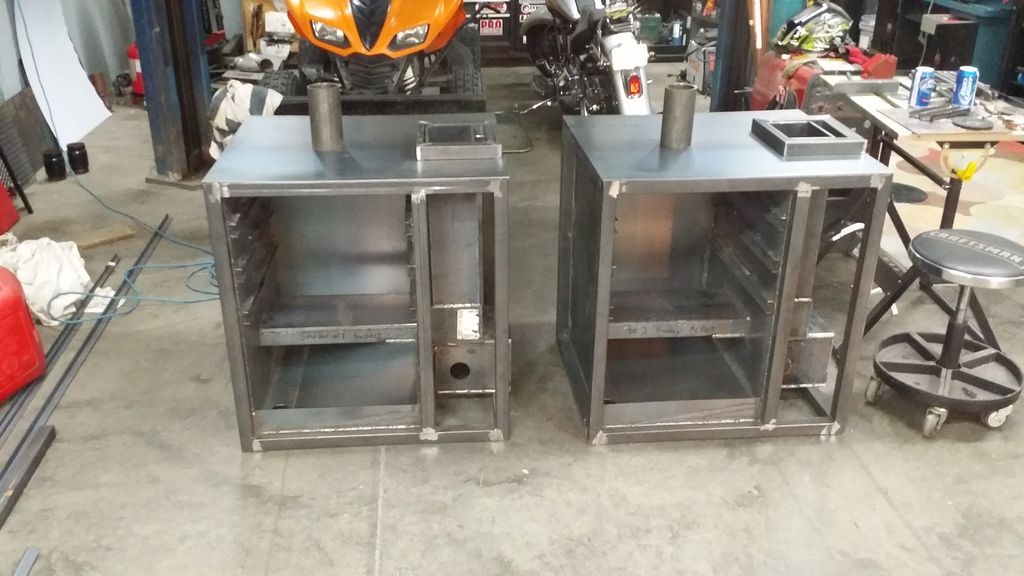
Here is where we ended the night.. We got the smoke stacks on and the main parts of the smokers done like cook chamber, firebox. Just need to start with insulation and exterior skins.

Image
Image
Image

On a side note, the 2" pipe running from firebox to the outside "air inlet" is freaking huge! We're seriously considering down sizing to a 1.5" just because the pipe, fittings, ball valves, everything is just monstrous in relation to this "mini" smoker. Partner in crime on this project has a full size stumps and it only has a 1.5" pipe feeding air into it so we think that should be sufficient, unless anyone else can talk us out of downsizing feel free to add your .02 as always!


User avatar
Puff
Expert
Expert
Posts: 2352
Joined: May 29th, 2013, 11:16 pm
Title: Always All In !
Location: New Jersey...Southern New Jersey

Re: Build thread, mini gravity fed smoker.

Post by Puff » November 3rd, 2015, 9:24 pm

I can't say from using the mini YET... But if you wanna close things down, you close the ball...if something crazy says you need a little more air flow...it is going to be one big pain the the butt to cut things open to increase it.

Honestly from my use of the big gf, I leave the ash door open for a while initially, it gets things going very well...but during an actual cook, I usually have the 2" ball valve almost 50% closed. My temps are SUPER STABLE for hours at a time. I could not do that by opening the ash door and not constantly monitor the temp. I'll bet Pete can come up with a calculator to determine velocity and volume of those valves in different sizes and positions.

I think I'd rather have the easy option...as you said....02cents


Make no mistake, there ain't no powder in this Puff ! And... I'm not really a crazy person but I play one in real life

scottyk
Just Got in trouble for buying tools
Posts: 43
Joined: September 22nd, 2015, 1:50 pm

Re: Build thread, mini gravity fed smoker.

Post by scottyk » November 9th, 2015, 1:28 pm

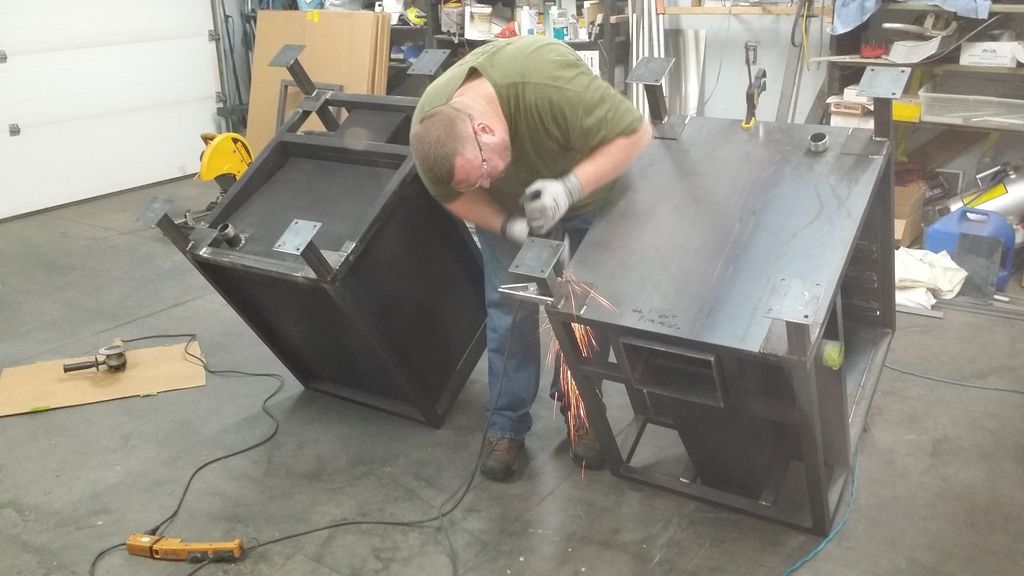
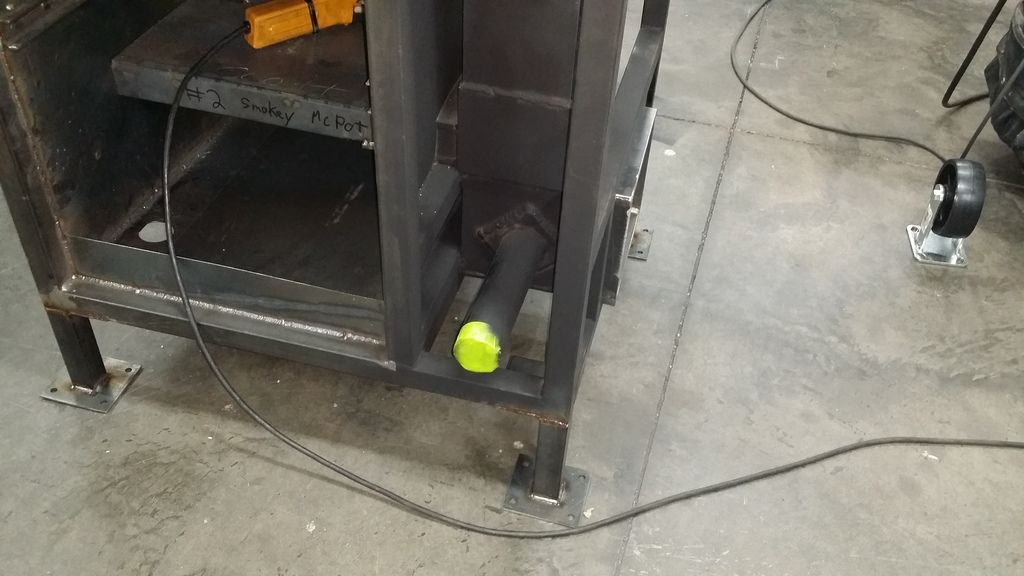
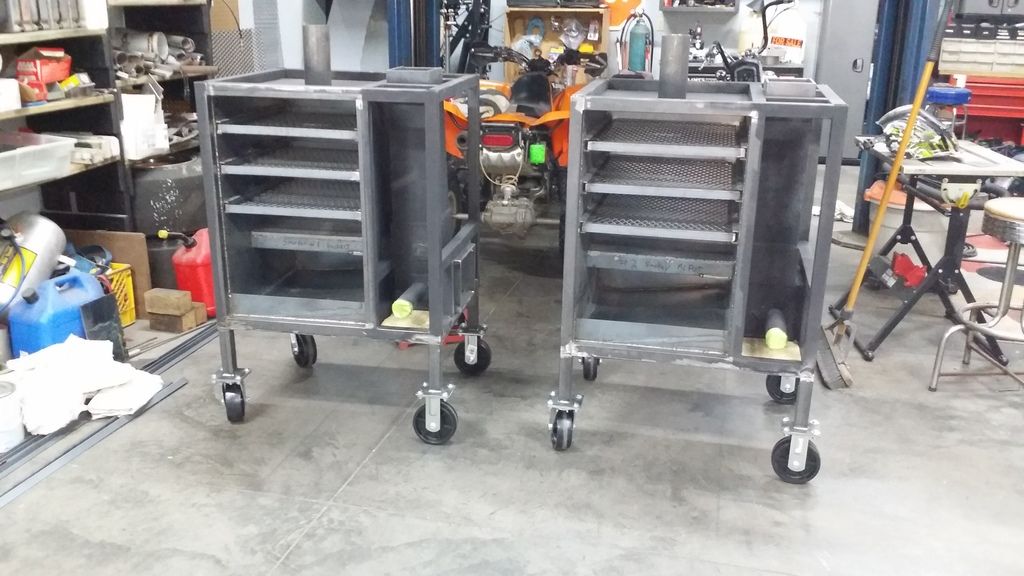
Got a few hours into the smokers this past weekend. Finished welding the air inlet pipe on, which had to have a flange plate welded to it, then welded the flange to the firebox to allow us to re-position the pipe to be perfectly perpendicular with the front sheetmetal. Ended up using the full 2" inlet just to make sure we will have sufficient airflow, and used the 1.5" drain just like the drawing calls for. The casters are slightly smaller in diameter than the plans call for so we extended the legs the appropriate amount to make up for that. Welded the plate to the frame, then the legs to that 1/8" plate. The bottom skin was then cutout to fit and welded the plate in the corners. So far our plan is to rivet the sheetmetal on to avoid warpage due to welding heat and use a reinforced filler on the outside corners so we can do a quick sanding to round the corners and finish them out before paint. The temperatures reached on the outside skin should be no higher than a typical automobile so most reinforced filler such as duraglass or all metal should be perfectly fine "we hope"

Then of course since these are gaining weight very fast we got them on casters so we can roll them around easily, feels great to start seeing them come together! Pretty soon we will be finishing up the exterior skins and start to put on hinges.

Thanks for watching.. more updates in a week or so!

Image
Image
Image
Image
Image


scottyk
Just Got in trouble for buying tools
Posts: 43
Joined: September 22nd, 2015, 1:50 pm

Re: Build thread, mini gravity fed smoker.

Post by scottyk » November 9th, 2015, 1:37 pm

oh yeah and decided to go ahead and coat the bare metal surfaces with some automotive header paint. supposed to be good to temps 2000 degrees. I just couldnt bring myself to permanently install sheetmetal over it with bare steel. Although Im sure it would have been fine.


User avatar
Big T
Moderator
Moderator
Posts: 6897
Joined: September 1st, 2013, 2:40 pm
Title: Go Getter
BBQ Comp Team Name: Backyard Boys
Location: Lower Alabama

Re: Build thread, mini gravity fed smoker.

Post by Big T » November 9th, 2015, 11:21 pm

You've done a heck of a job so far, I can't wait to see them finished !


Measure Twice.....Cut Three Times.

Pitstopon66bbq
Newbie
Newbie
Posts: 4
Joined: February 25th, 2014, 9:07 pm

Re: Build thread, mini gravity fed smoker.

Post by Pitstopon66bbq » November 10th, 2015, 1:59 am

Alot of the header or engine enamels have to be cured up to 650 degrees. I found a company called kbs coatings that sells a 1500 degree primer and paint I'm spraying mine with and it cures at 350 so its more in line with what a smoker can safely get up to without warping stuff. It's called Xtreme temperature coating, its a zinc self leveling primer and paint system. Im in the same boat I've spent enough time and money on this I don't want to skin it without sealing the entire frame.


Post Reply
  • Similar Topics
    Replies
    Views
    Last post

Return to “Smoker Clones”